Use Plex on the Raspberry Pi to create the ultimate home theater server - Android
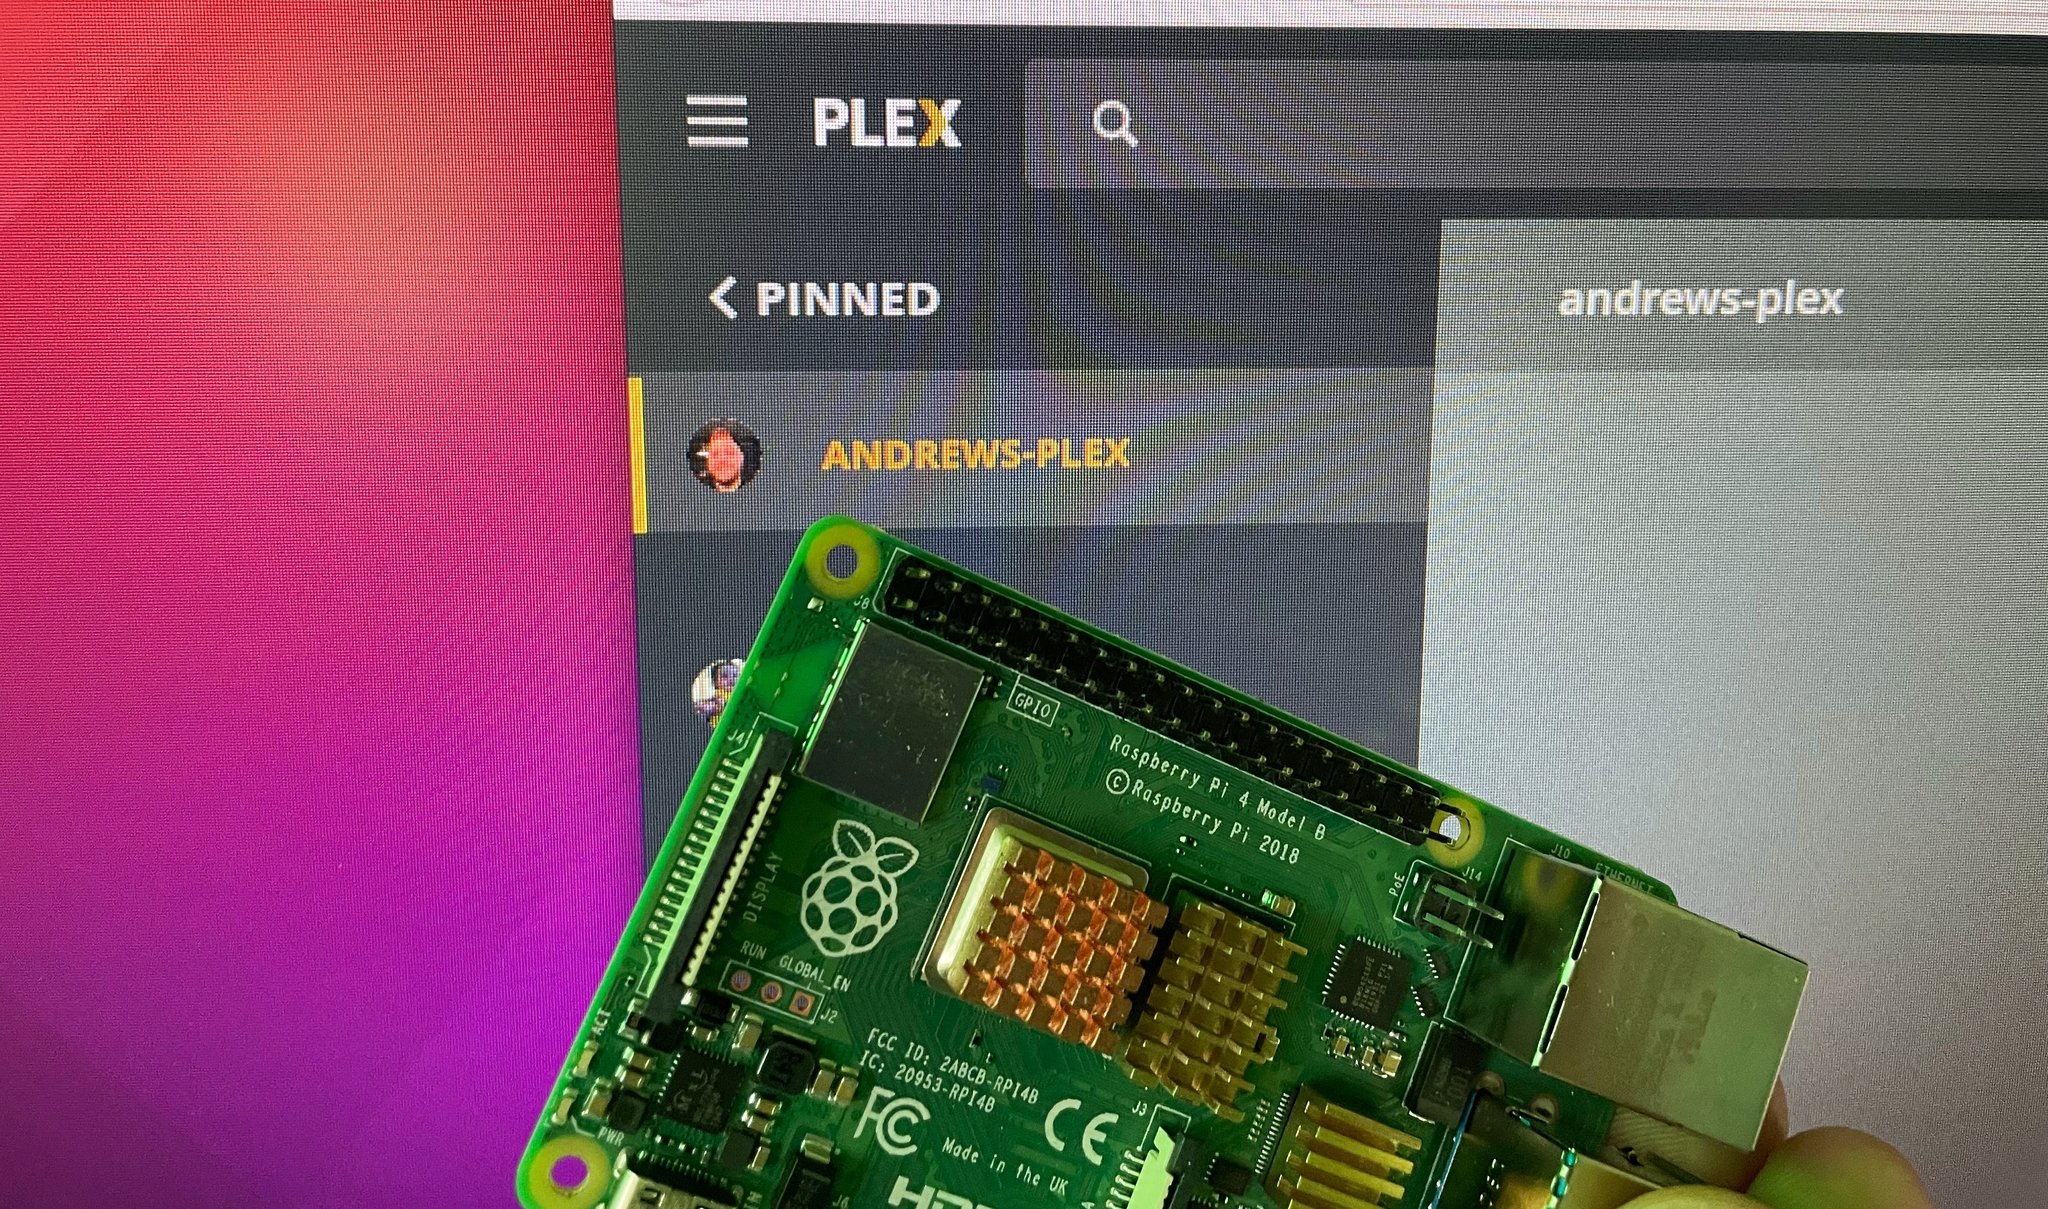
The Raspberry Pi's convenience, versatility, and usefulness simply cannot be understated. With just a few clicks, you can set up just about everything, including the ability to set up Plex on a Raspberry Pi. After you've finished loading up your library of movies, TV shows, and even music, you can then download the Plex app on any of your devices and enjoy your favorite content from anywhere. Today, we're going to show you how you can get everything set up.
Products used in this guide
- Stream all the things: CanaKit Raspberry Pi 4 8GB Starter Kit
- Store all the things: Seagate Expansion 6TB External Hard Drive
- Install the desktop: Raspberry Pi Imager
What you'll need to install Plex on a Raspberry Pi
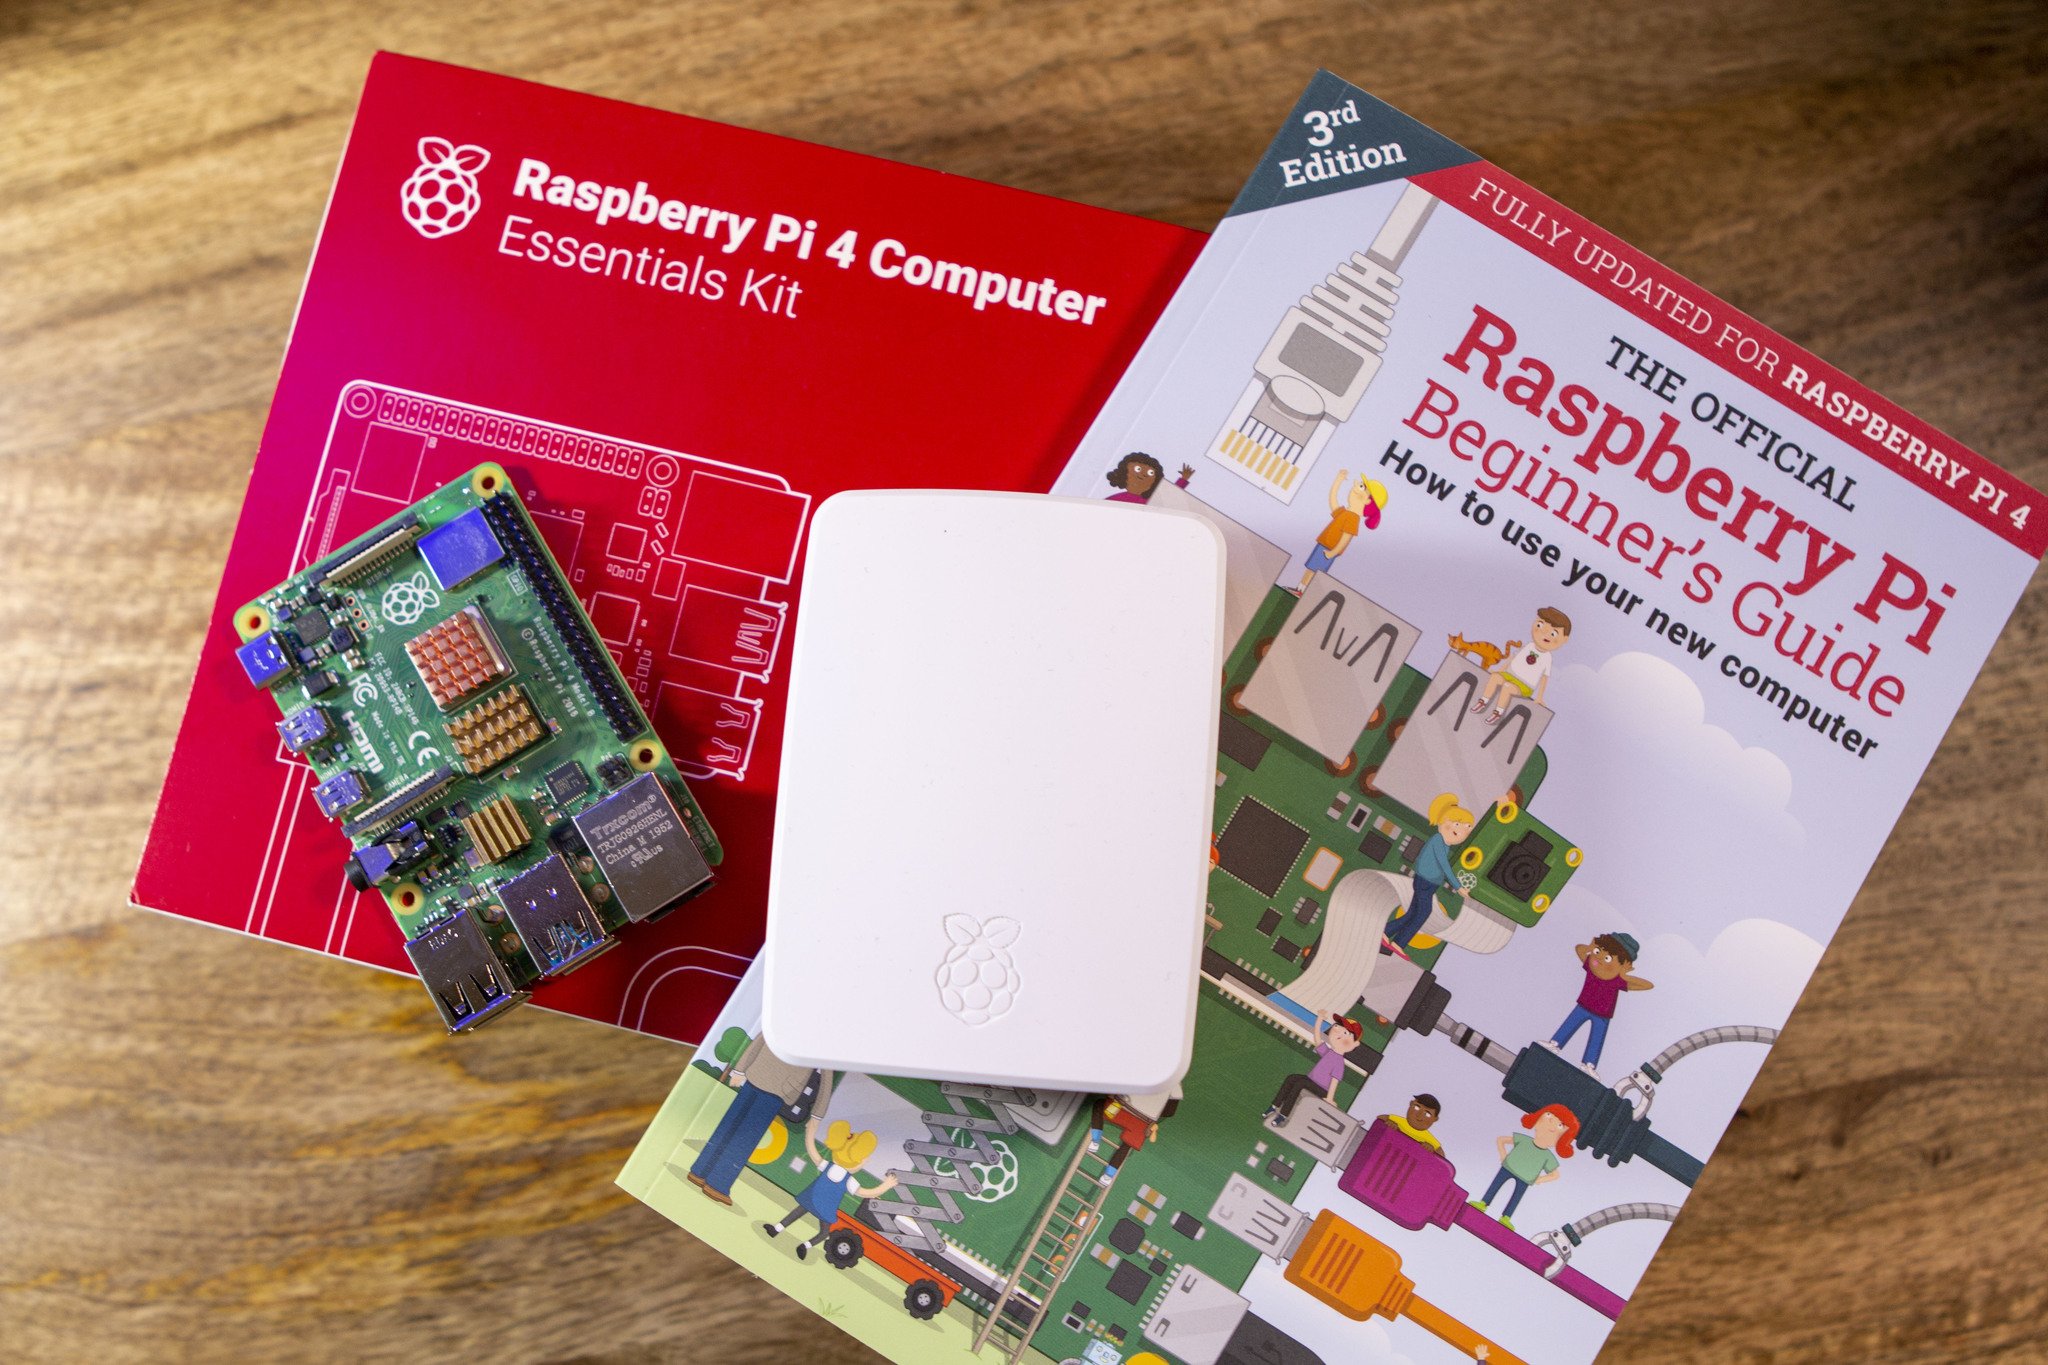
- Raspberry Pi 2, 3, or 4: I recommend using the Pi 4 as it comes with built-in Wi-Fi. It has beefier hardware and offers great value. You can choose from 1GB, 2GB, 4GB, or even 8GB RAM configurations, and I have the 8GB option as that gives me more overhead for adding more things later on. If you're getting one for just a Plex server, I'd suggest going with the 2GB RAM variant.
- Power adapter: Your Raspberry Pi needs an external power source, and you can pick one up on Amazon. The wattage of the wall unit varies based on the Pi model you're picking up. I'm using the Pi 4 here, and it needs a USB-C 15W power adapter.
- MicroSD card: You'll need a MicroSD card to install Raspbian, the Raspberry Pi's official operating system.
- Ethernet cable: It's recommended to plug in your Raspberry Pi to your router via an Ethernet cable. The Pi 4 has a built-in Wi-Fi modem, but as you're going to use it as a media server, you may as well plug in.
You can pick up all of the components individually, or you can grab one of the best Raspberry Pi kits, as these will include everything you need. I'm partial to this Canakit Raspberry Pi 4 starter kit as it has everything you need in a single package. That includes a 4GB Raspberry Pi 4, a case, heat sink, fan, 32GB Samsung Evo MicroSD card, power adapter, and an HDMI cable.
In addition to that, you'll need an external HDD that has your movies and music collection. This will come down to personal preference, but you should at the very least make sure that you are using an external drive with USB 3.0. This provides fast transfer speeds and better reliability when plugging in the drive to your Raspberry Pi.
Plex on a Raspberry Pi: Installing a desktop
There are a few different ways that you can set up Plex on a Raspberry Pi, including using the good ole' terminal commands. However, we will take an easier route by installing the Ubuntu Desktop to provide that traditional computer experience. Doing so will make it a bit easier to deal with if problems arise with your Plex server, along with being able to install pretty much anything else that you might want onto your Pi.
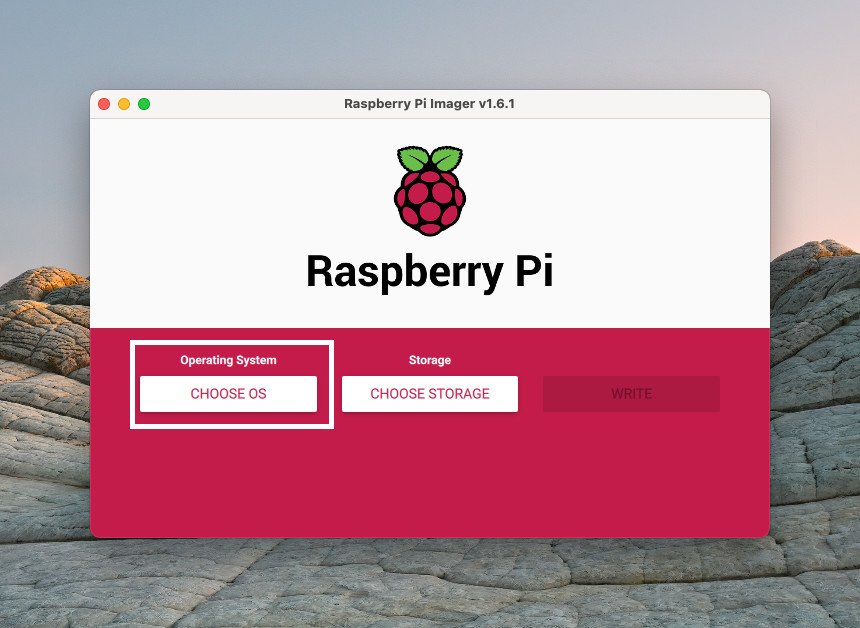
To proceed, we first need to install Ubuntu onto the Raspberry Pi itself. And to do that, you'll need to download the Raspberry Pi Imager application, which works with macOS or Windows. Once installed, follow these steps:
- Insert your microSD card into your computer.
- Open the Raspberry Pi Imager app.
Click the Choose OS button in Pi Imager.
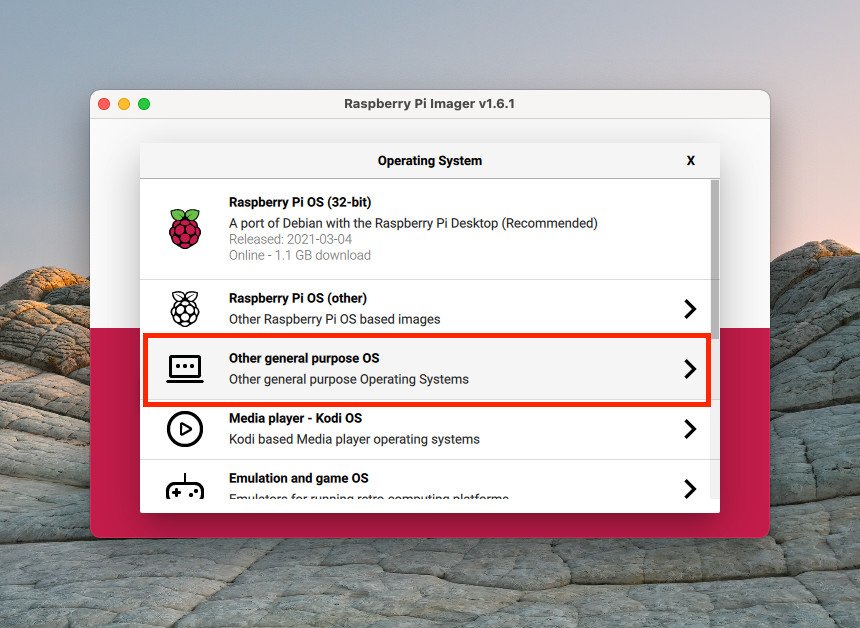
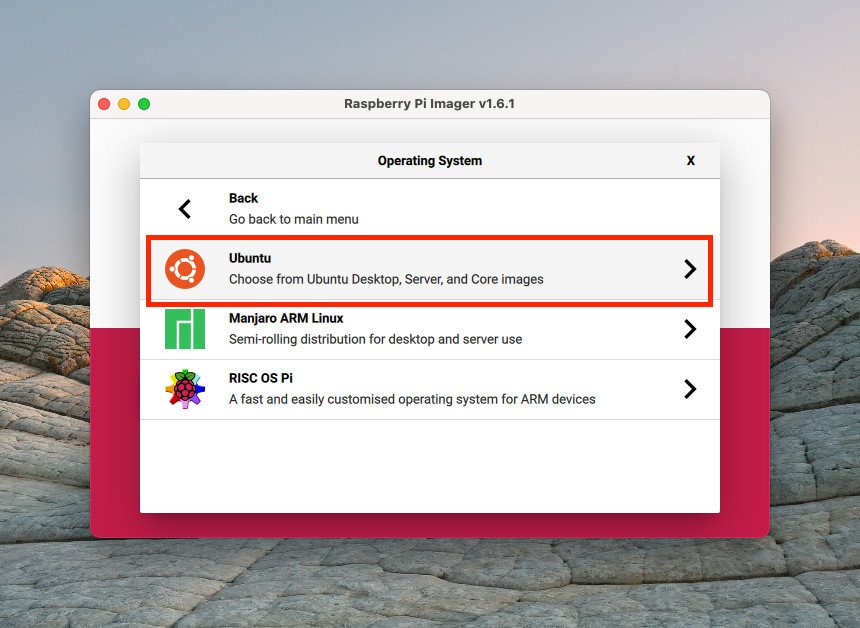
- Select Other general purpose OS.
- Select Ubuntu at the top of the list.
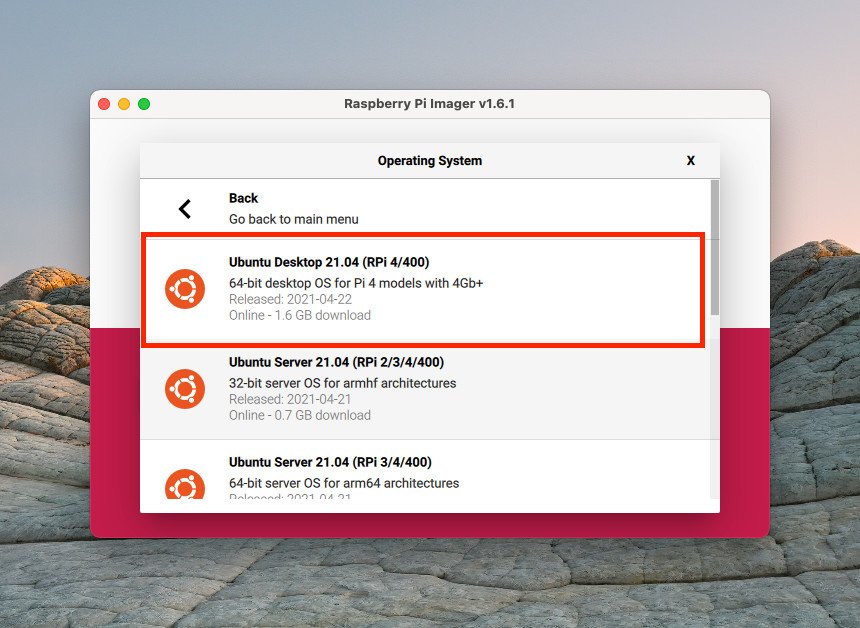
Select Ubuntu Desktop from the list.
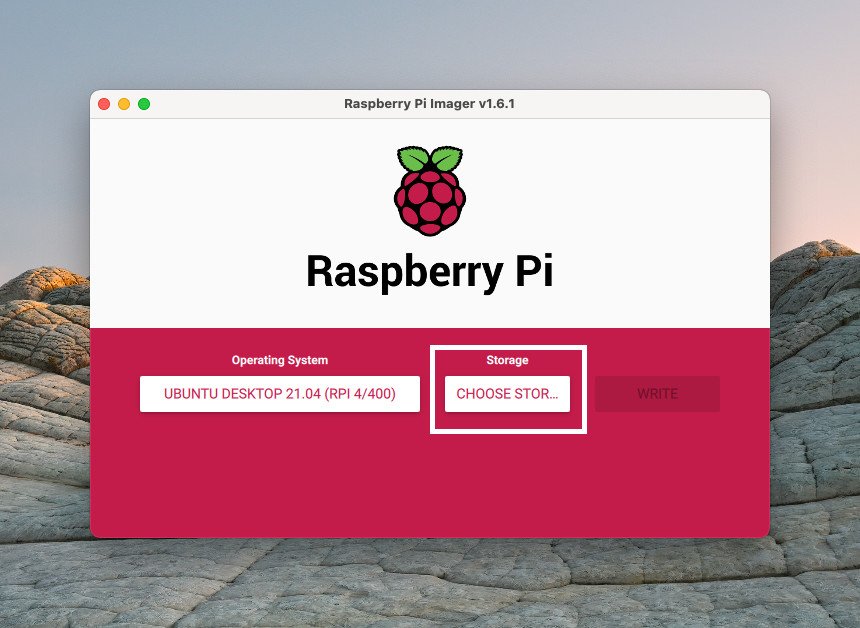
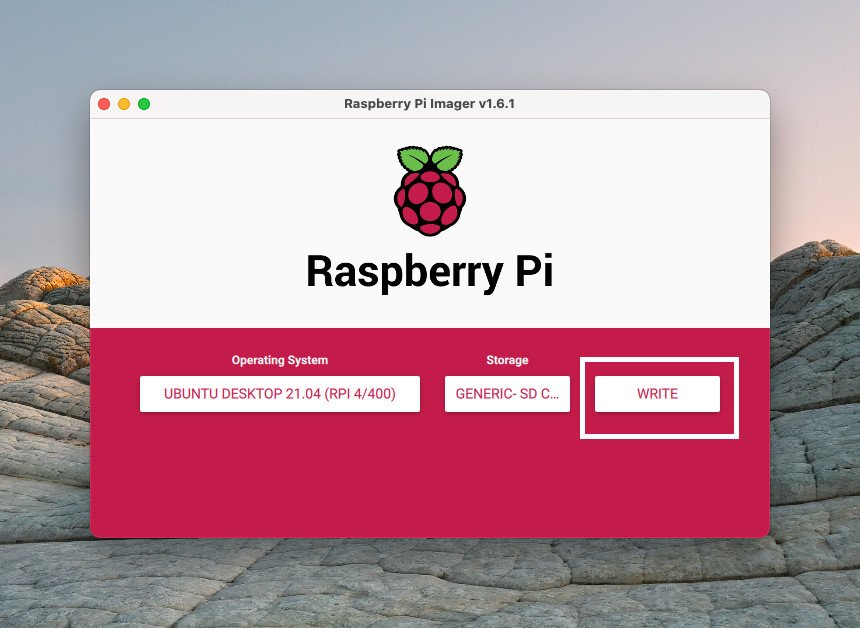
- After you are taken back to the main Pi Imager screen, click the Choose Storage button.
- Select your inserted microSD card from the list.
- Click Write.
Confirm that all of the data on the card will be erased.
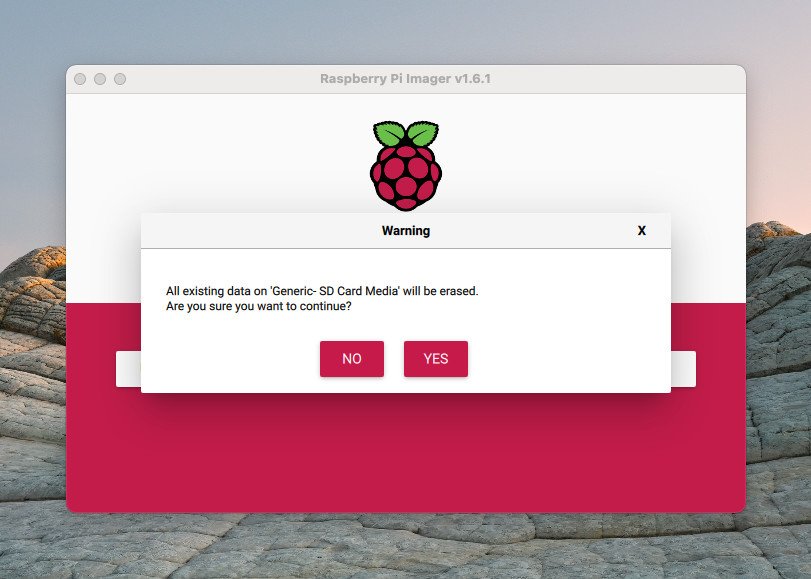


This process may take a bit of time, as the Raspberry Pi Imager app installs an entirely new operating system onto your microSD card. From there, just insert your newly-minted microSD card with Ubuntu into your Raspberry Pi and get ready to have some fun.
Plex on a Raspberry Pi: Setting up Plex
Now that your microSD card has an operating system on it, it's time to get things set up with the Pi itself. If this is your first go-'round with Pi, you'll need to make sure you have a USB keyboard and mouse handy for the obvious reasons. Fire up your Raspberry Pi, and follow these steps to get Plex working.
- Follow the on-screen prompts to finish the setup of your Ubuntu desktop.
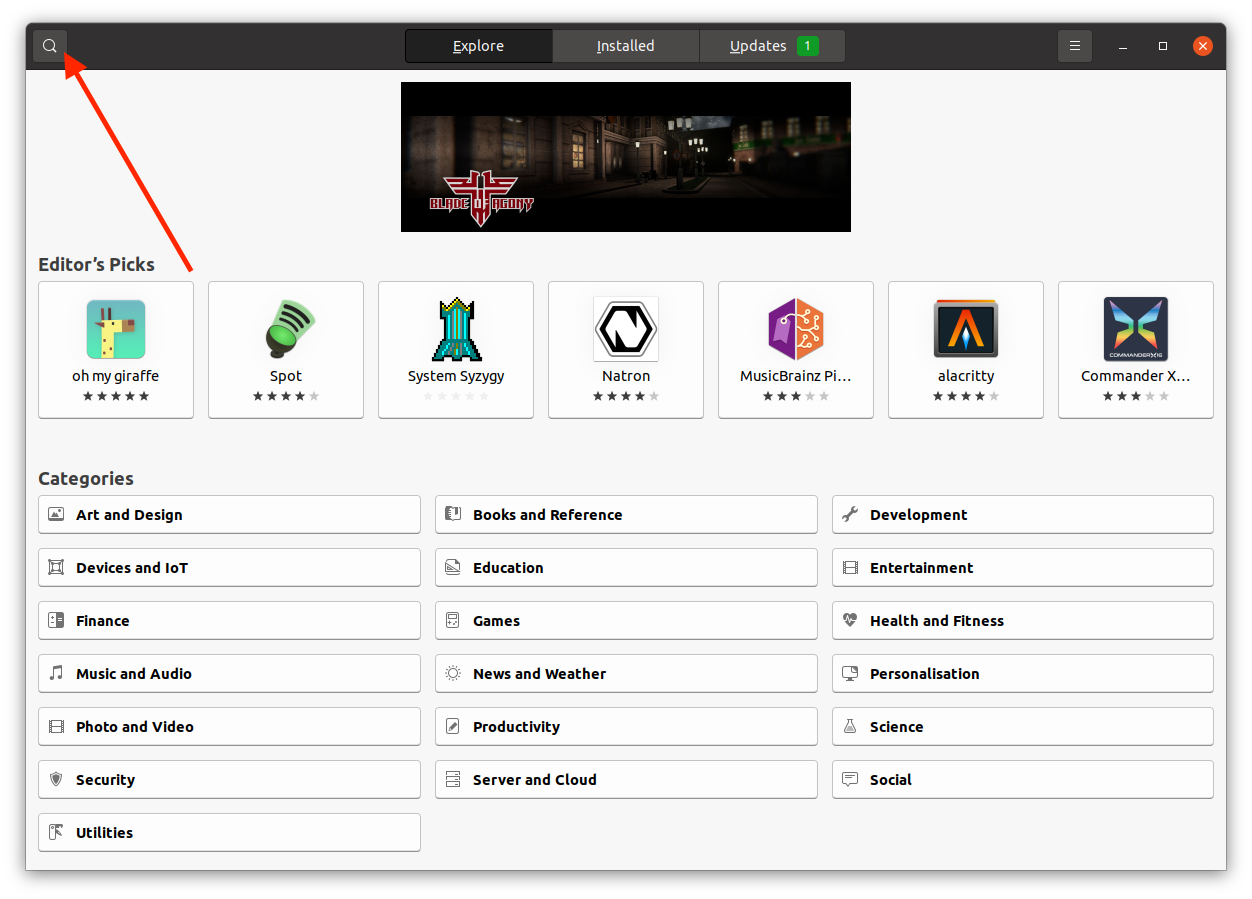
- Open the Ubuntu Software store on your Raspberry Pi.
Click the magnifying glass in the top right corner to search.
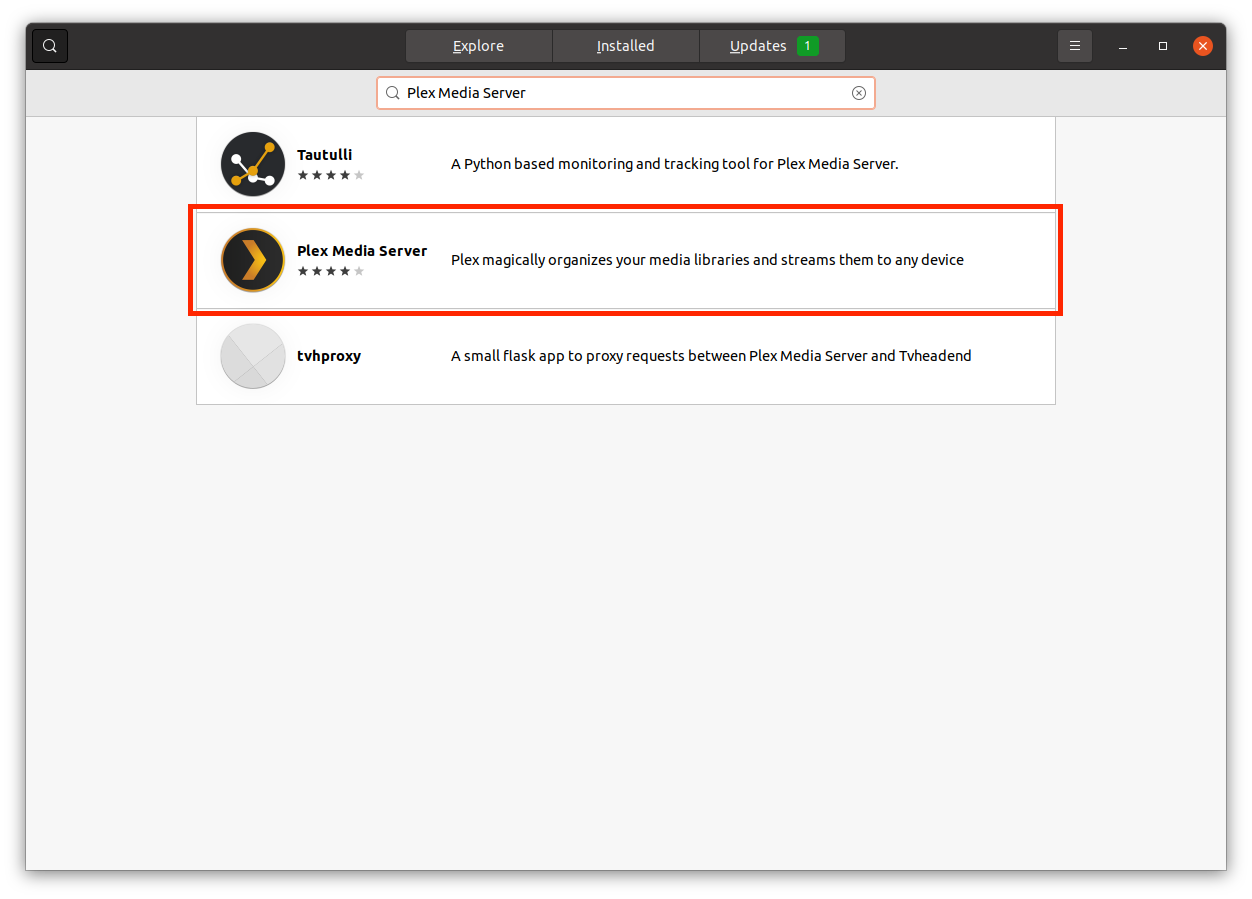

- Search for Plex Media Server.
- Select Plex Media Server from the list of apps that appear.
- Click the Install button.
- Enter your password if prompted.
Close the Ubuntu Software app.
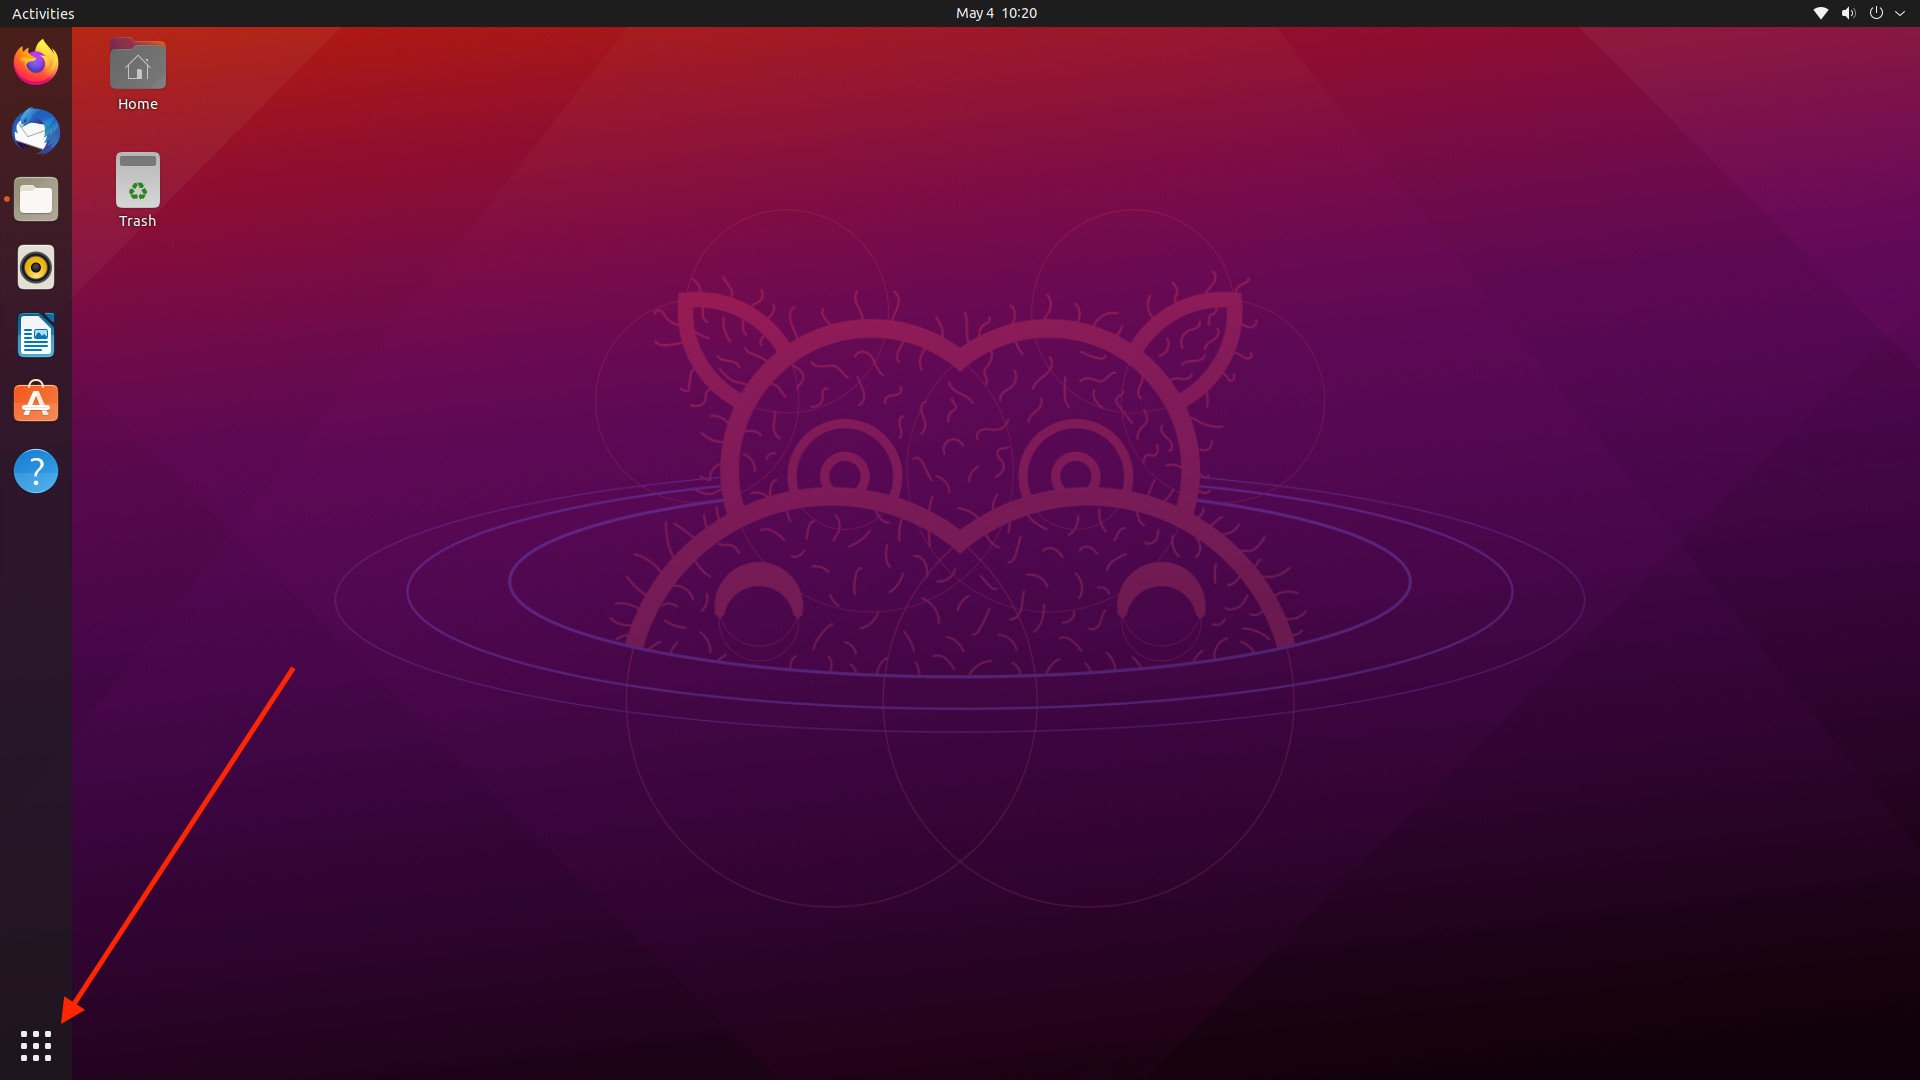
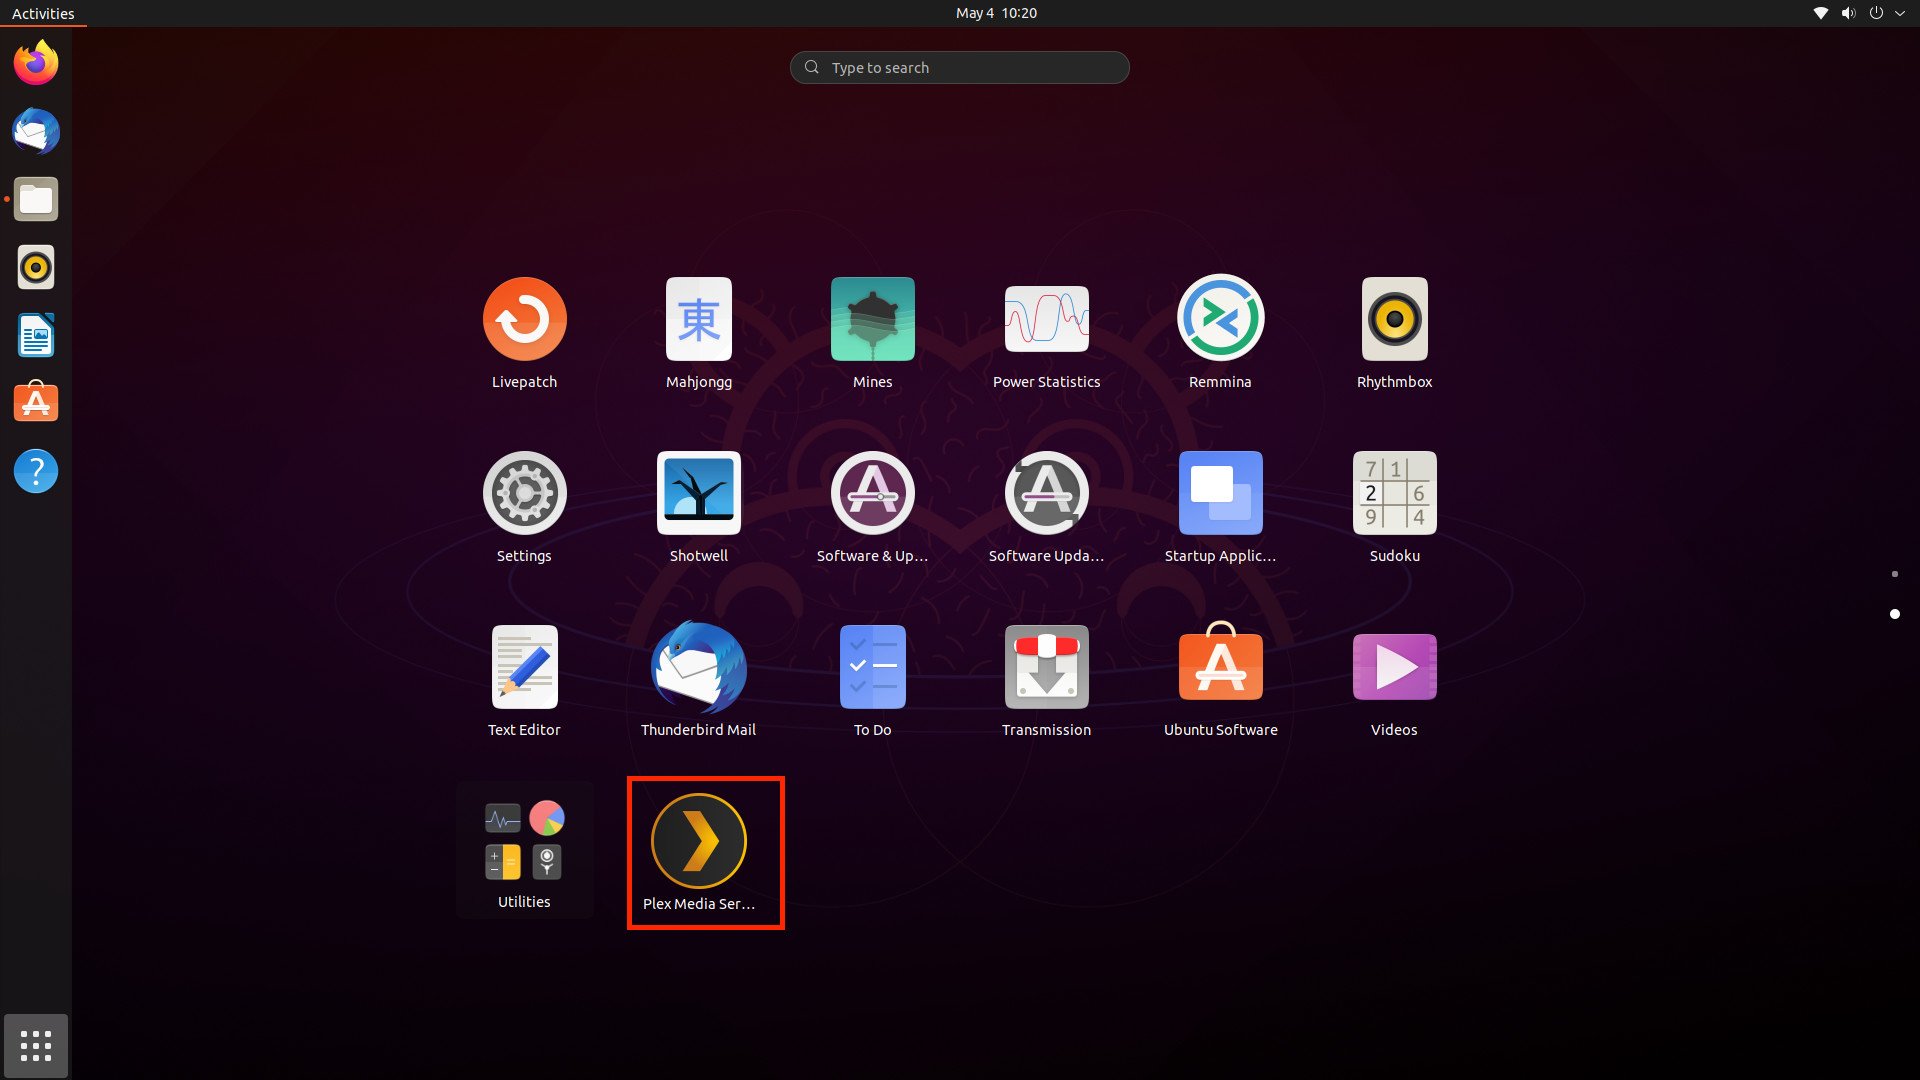

- Click the app drawer icon in the bottom right.
- Click the Plex Media Server app icon.
- A window will appear within the browser of your choice, taking you to the Plex website.
- If you have a Plex account already, sign in. If not, you can create an account from here.
After a few moments, you'll be prompted to create your Plex server. Here are the steps to get the server created.
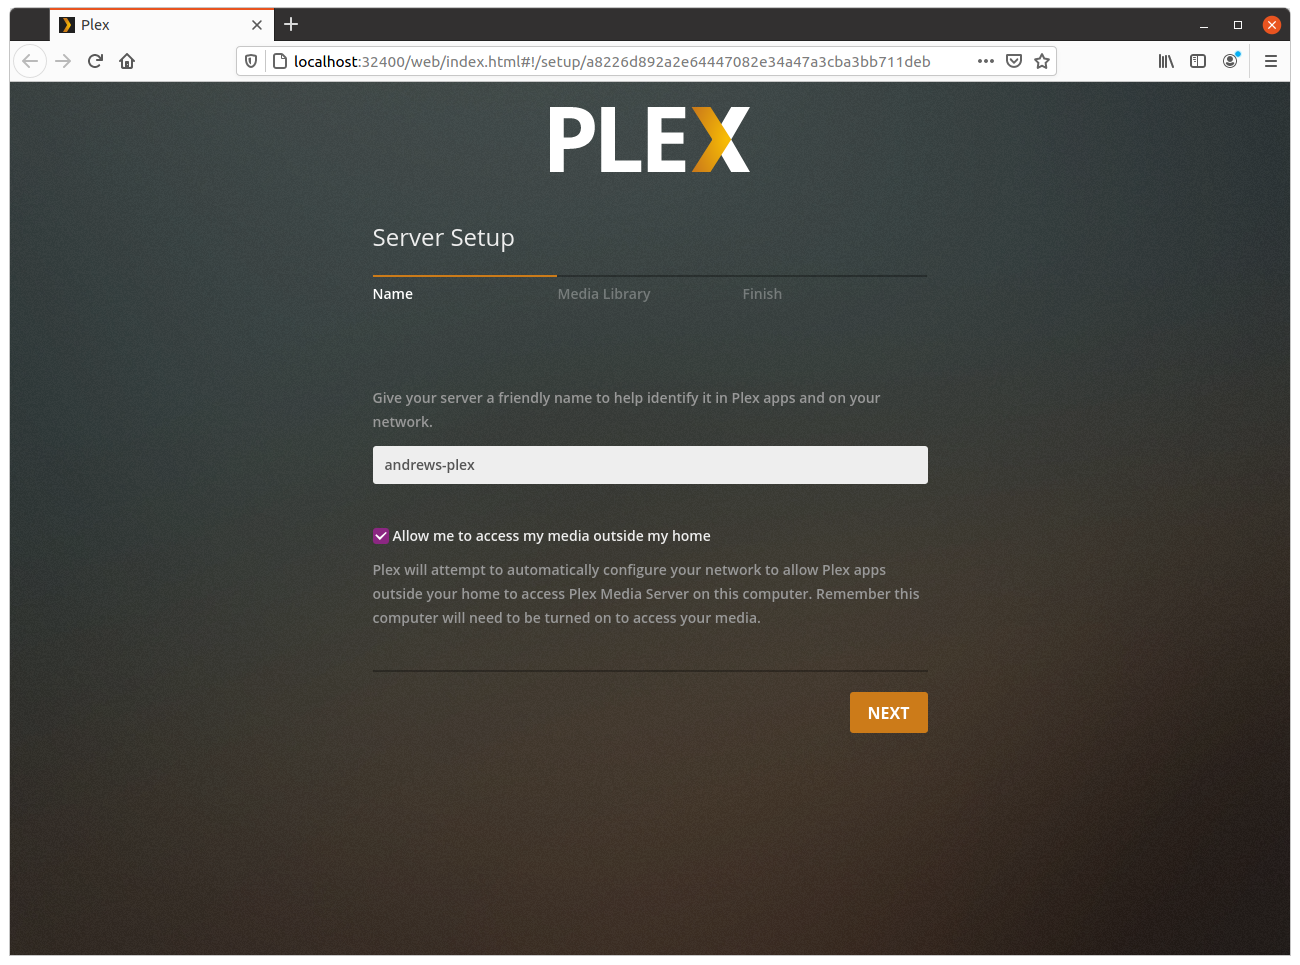
- Give your server a name. You can also opt to allow the media to be accessed from Plex even if you aren't home using the Plex app on your laptop, tablet, or Android phone.
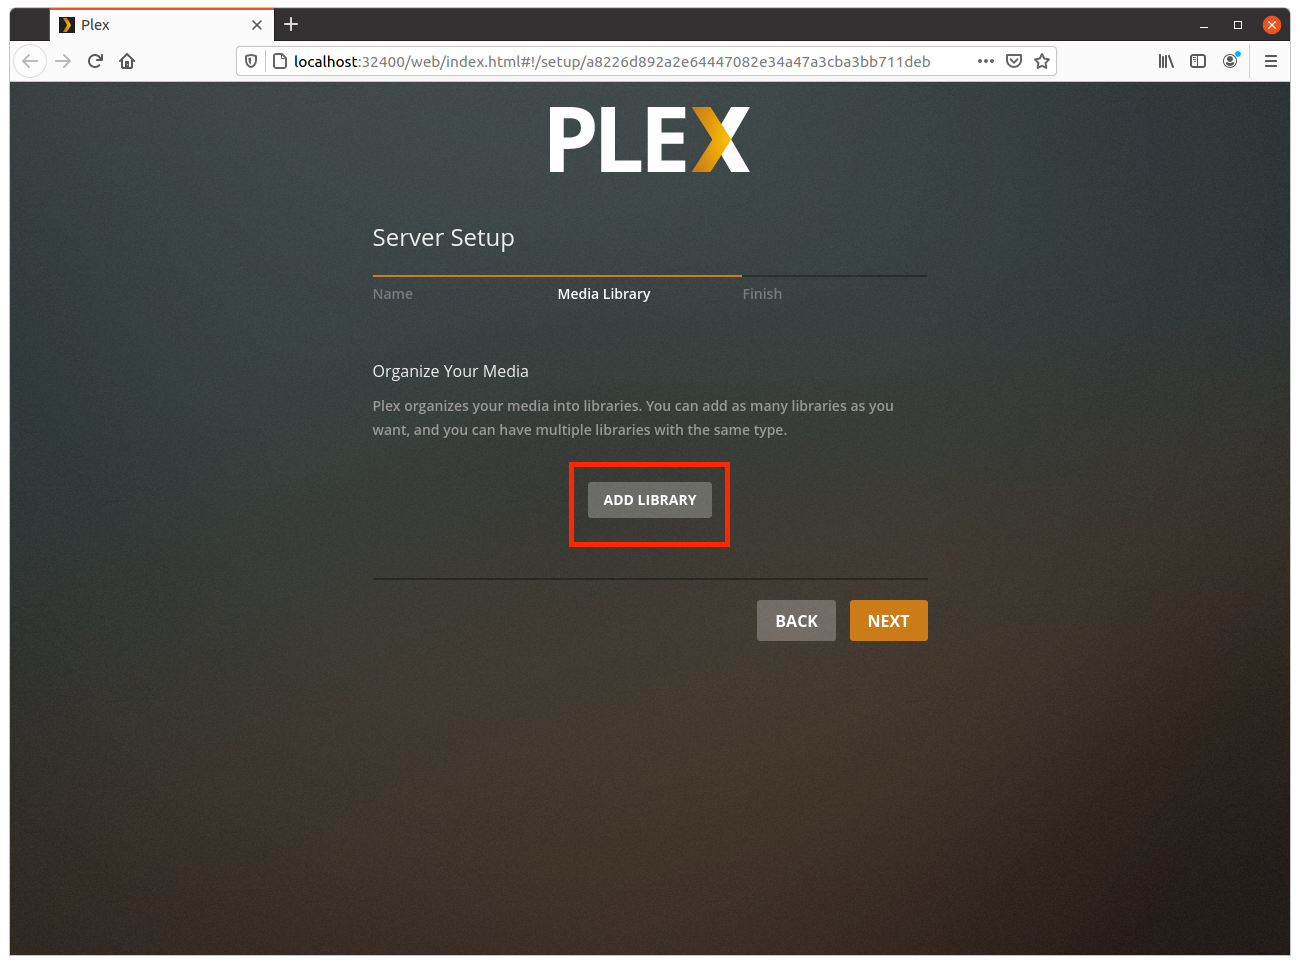
- Click the Add Library button so that you can add content to your Plex Media Server.
Choose your Library Type, opting for Movies, TV Shows, or other forms of content.
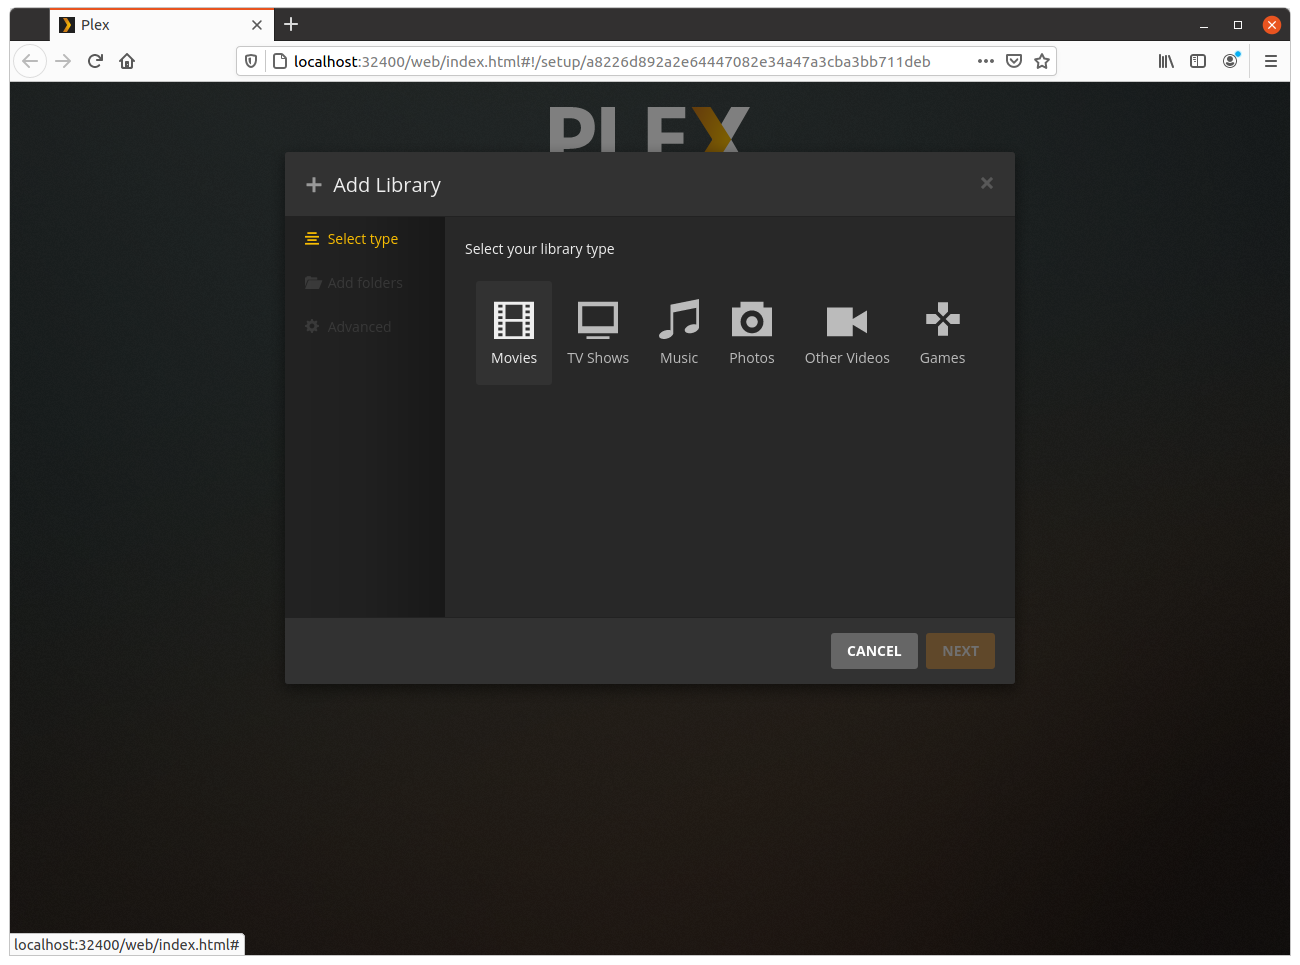
After making your selection, click Next.
- Click Browse for Media Folder in order to add the content you want to access.
- Navigate to /home/yourname/Music from the file browser.
Click the Add button.
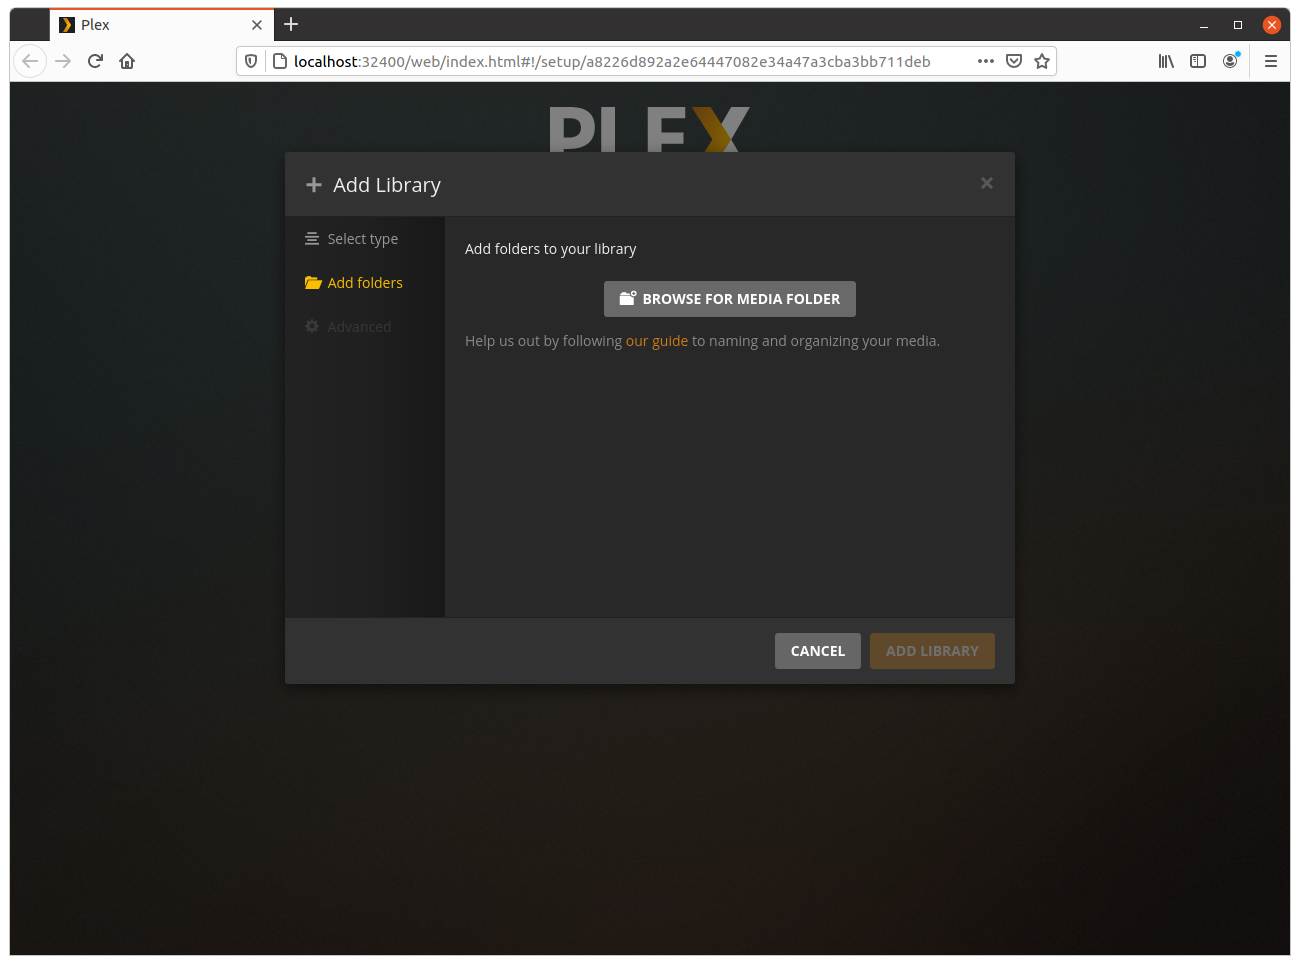
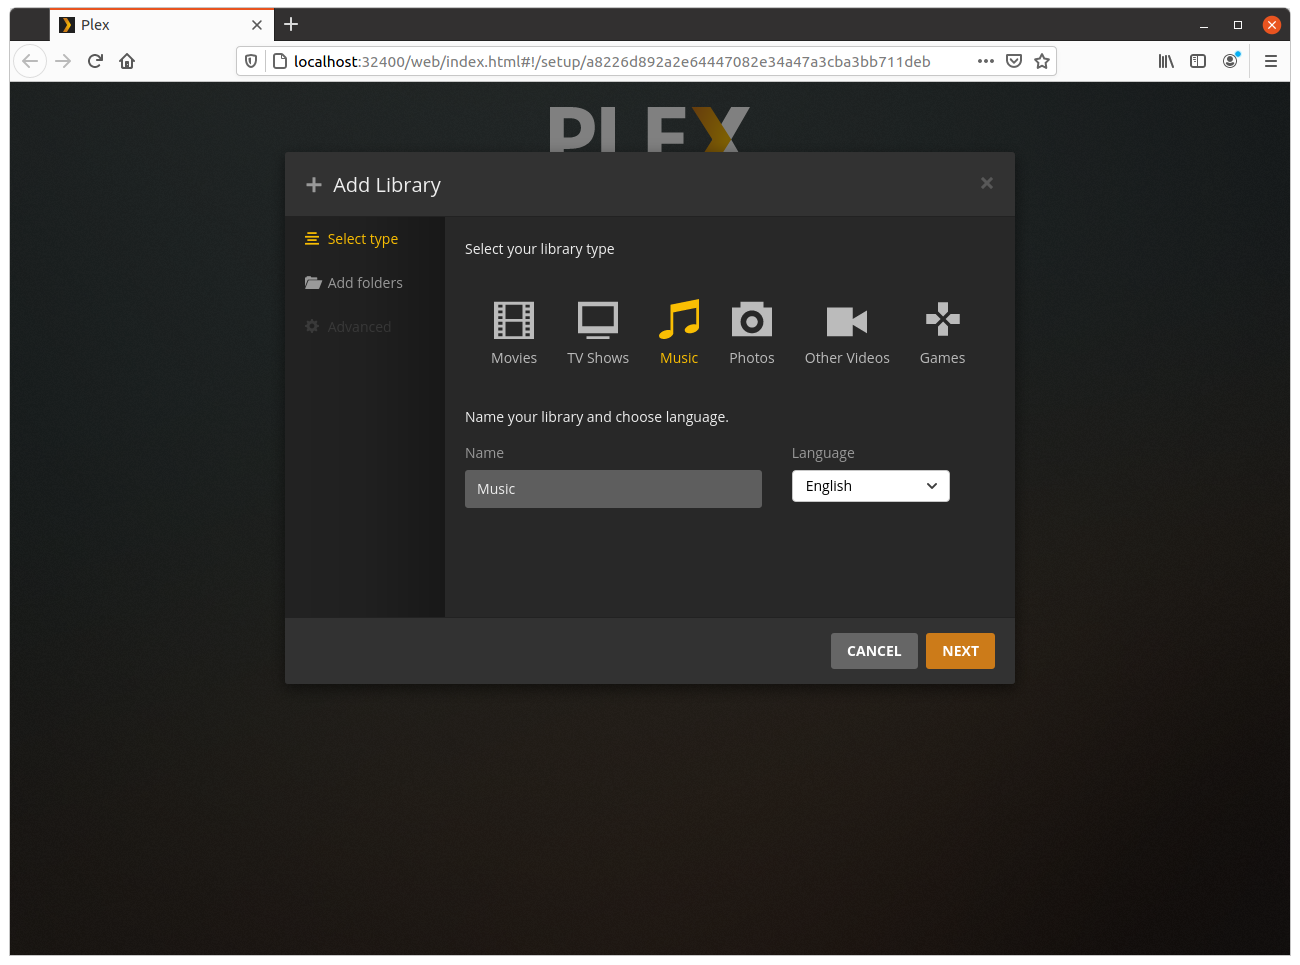

- Click Add Library.
- Once added, click Next.
- Click the Done button after you are taken back to the Plex screen.
Stream all the things
CanaKit Raspberry Pi 4 8GB

$120 at Amazon $120 at Best Buy
The perfect companion computer to create a Plex Media Server.
Instead of trying to piece together a Raspberry Pi system, this CanaKit Raspberry Pi 4 Kit includes everything you need. Along with the Raspberry Pi board, you'll get a case, power supply, heat sinks, and even a microSD card to get started.
Store all the things
Seagate Expansion 6TB External Hard Drive

$125 at Amazon $135 at Walmart $125 at B&H Photo
A media server requires plenty of storage.
The included microSD card for your Raspberry Pi system is likely far too small to handle your vast library of content. but with the Seagate Expansion 6TB External Hard Drive, you can load everything up from there and use it as the source for your Plex Media Server running on Raspberry Pi.
05/05/2021 08:00 PM
Youtube automatic translation feature may be ready soon
05/05/2021 08:00 AM
DXOMARK adds price segmentation in benchmark rankings
05/05/2021 07:02 AM
Twitter is getting a long overdue change (emphasis on the 'long')
05/05/2021 09:51 PM
Twitter is rolling out full-size image previews on mobile today
05/05/2021 10:18 PM
Raspberry Pi 3 review - Still relevant
05/05/2021 10:30 AM
Paul George debuts his new $120 'PlayStation 5' sneakers
05/05/2021 04:00 AM
Signal tried to use Facebook's targeted advertising data against it
05/05/2021 12:05 PM
- Comics
- HEALTH
- Libraries & Demo
- Sports Games
- Racing
- Cards & Casino
- Media & Video
- Photography
- Transportation
- Arcade & Action
- Brain & Puzzle
- Social
- Communication
- Casual
- Personalization
- Tools
- Medical
- Weather
- Shopping
- Health & Fitness
- Productivity
- Books & Reference
- Finance
- Entertainment
- Business
- Sports
- Music & Audio
- News & Magazines
- Education
- Lifestyle
- Travel & Local


