How to take a screenshot on a Chromebook - Android
Fullscreen, snippets, and screen recordings — Chromebooks can do them all.
Sometimes, you just need to show someone else the thing that's on your Chromebook's screen. In this case, taking a screenshot is the easiest thing to do. There are a few different ways to take screenshots on a Chromebook — or to take screen recordings now that Chrome OS 89 made the ability widely available — but no matter what you need to capture, here's how to get it done.
Chrome OS Screen Capture
- How to take screenshots with buttons
- How to use the new Screen Capture toolbar
- How to take screenshots with stylus
- How to record your Chromebook's screen
How to take a screenshot with Chromebook buttons
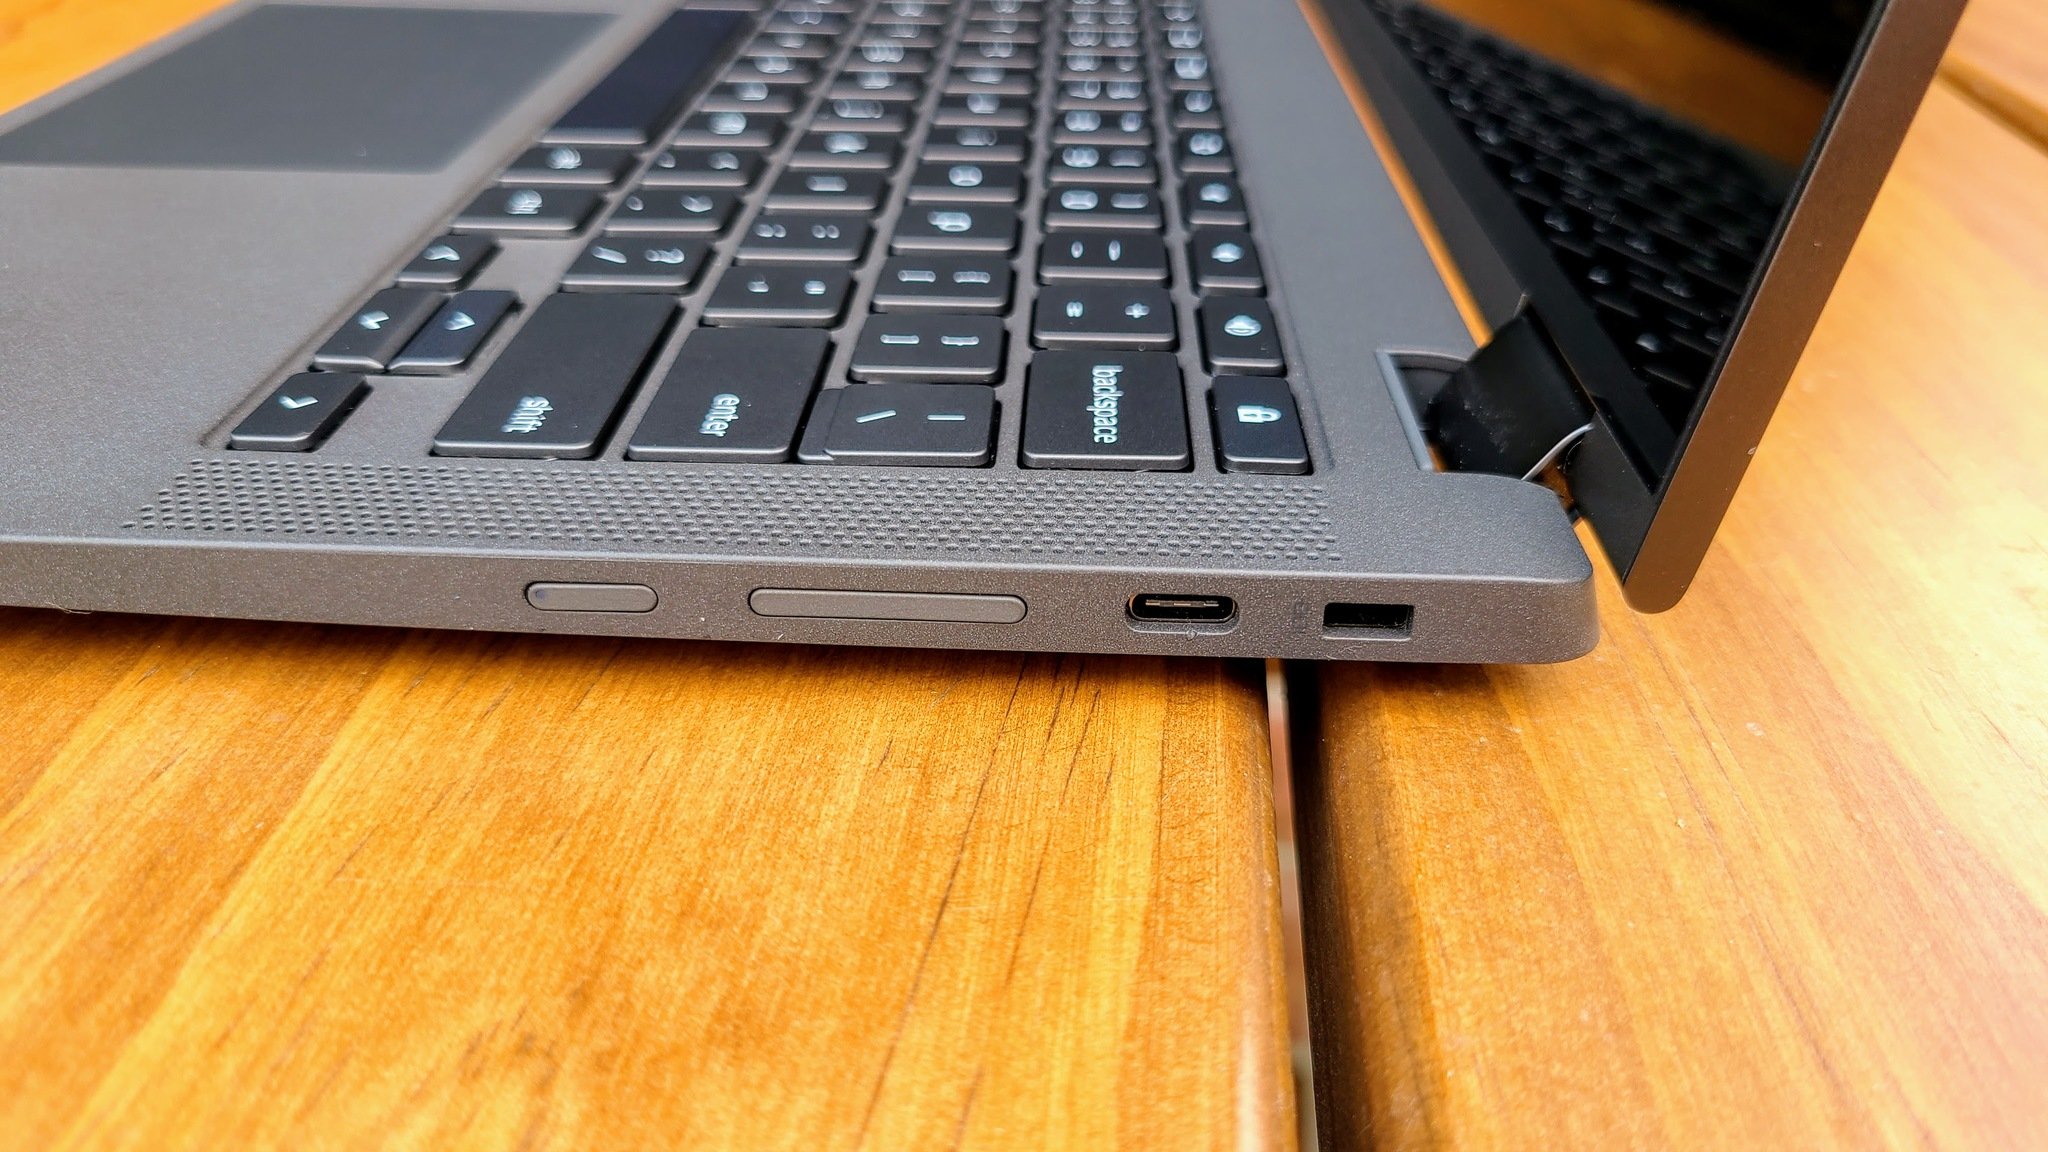
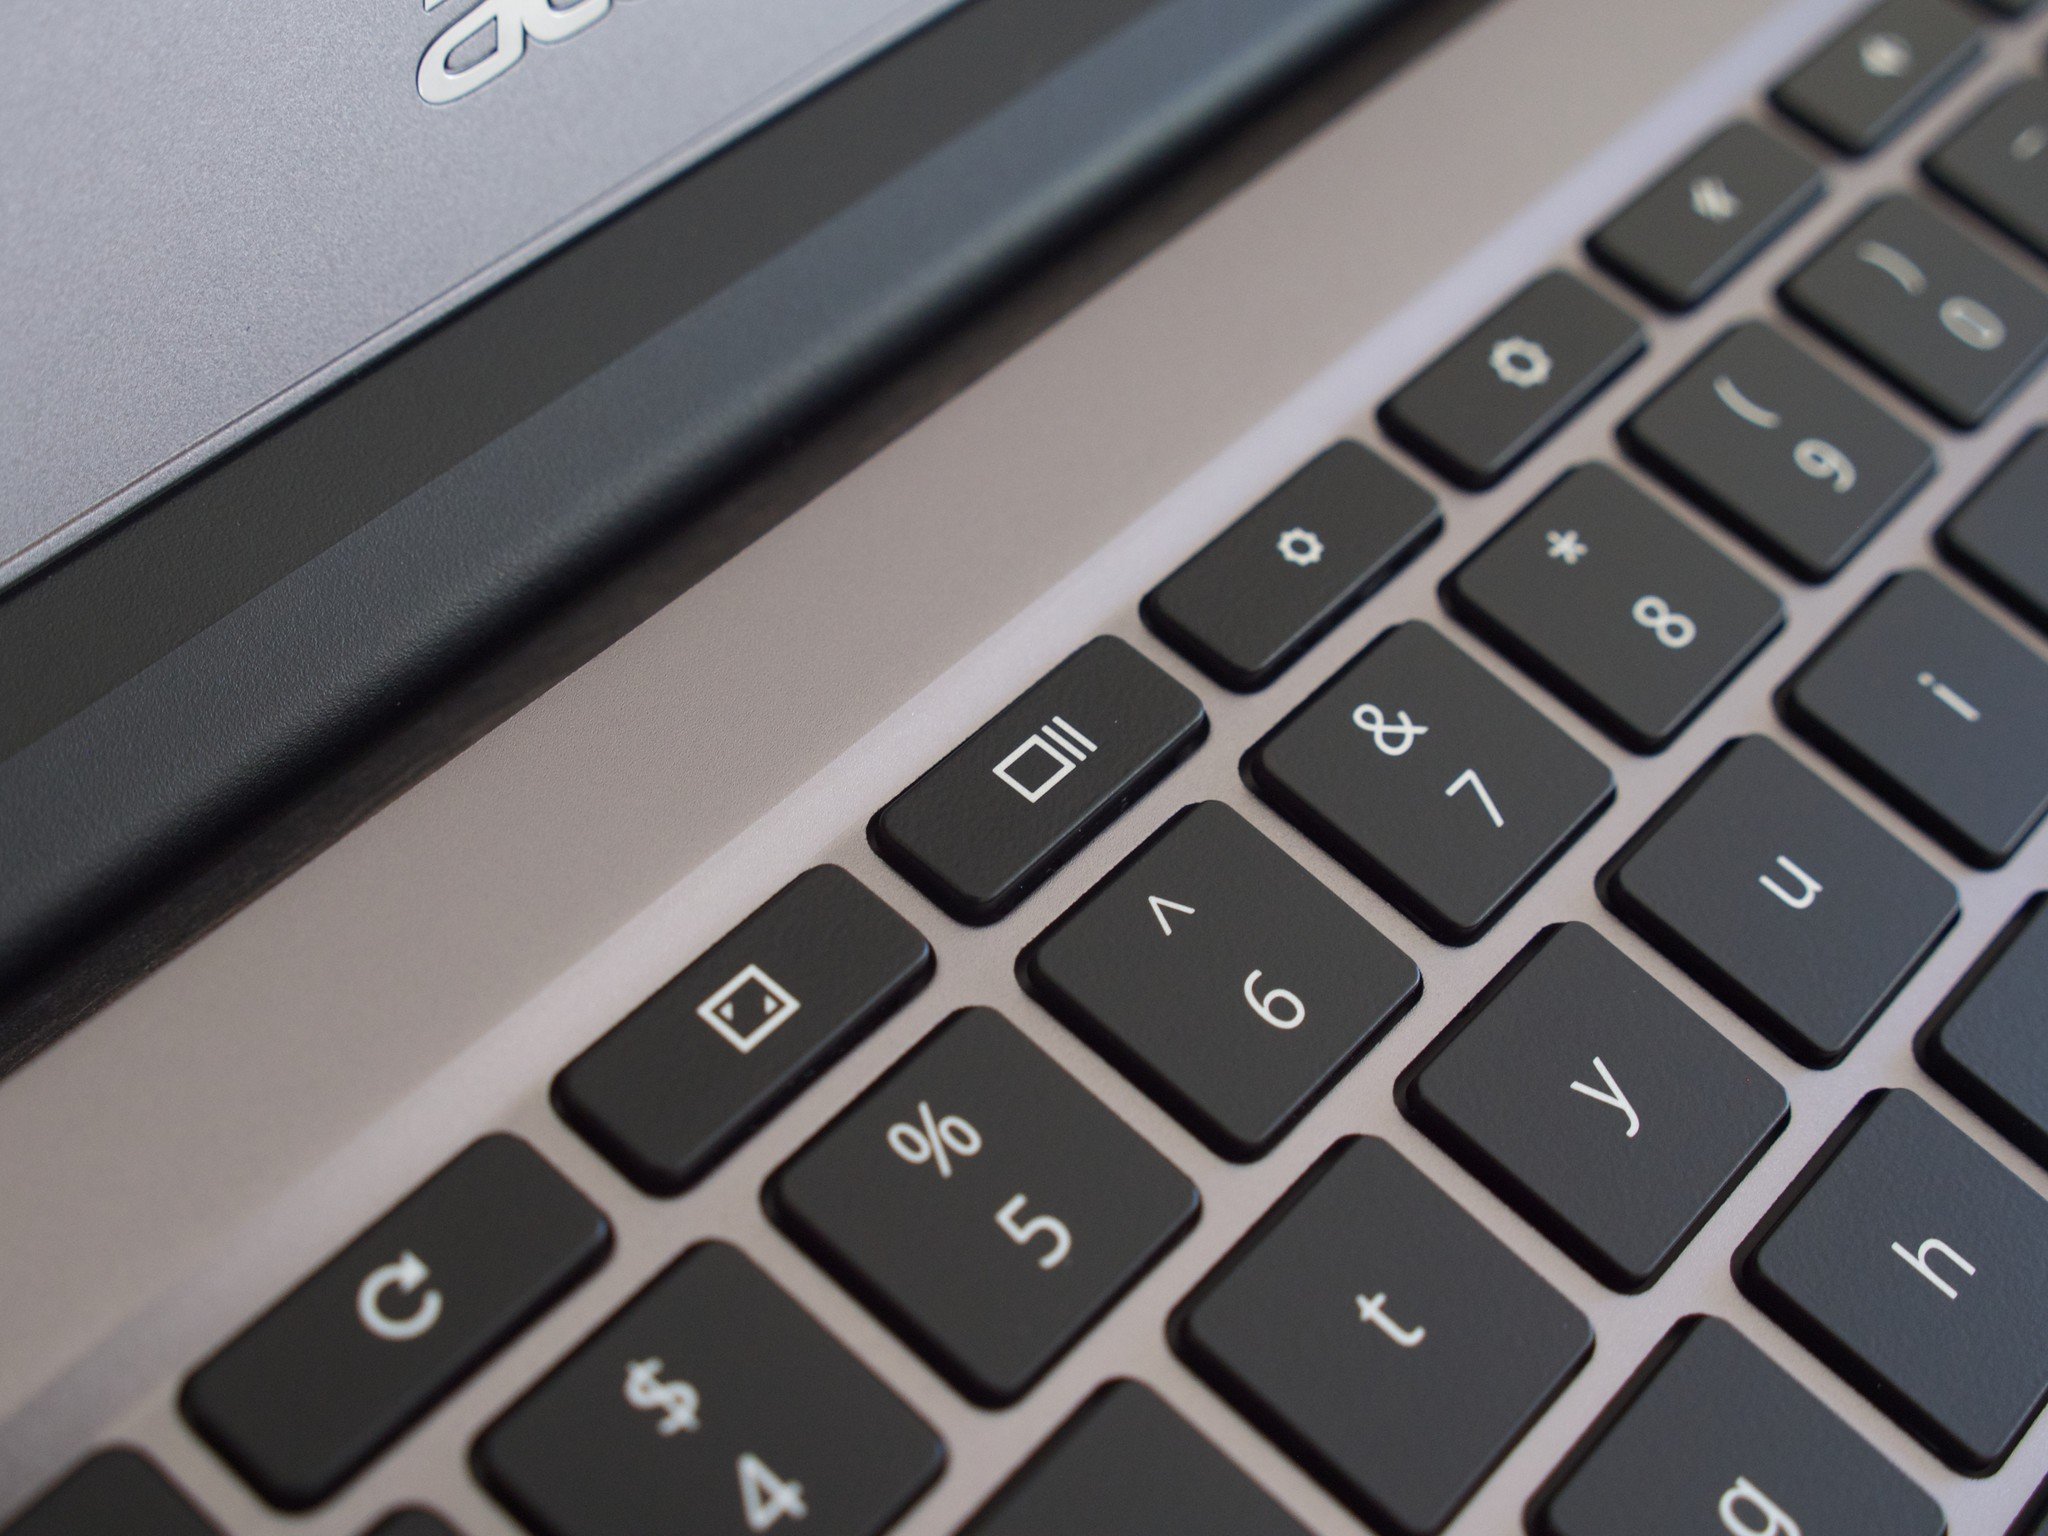
In most cases, the easiest way to take a screenshot on your Chromebook is by using button combinations. There's three keyboard shortcuts for screenshots you'll want to remember:
- Power + Volume Down to take a screenshot of the entire screen. While is tablet mode this is the only button-combo for screenshots you can use.
- Ctrl + Overview (the 🔲|| symbol in the right image above) to take a screenshot of the entire screen.
- Ctrl + Shift + 🔲|| to open the Screen Capture toolbar with single-window screenshot mode enabled.
Note: it's worth mentioning that the keyboard commands are slightly different if you're using an external keyboard that has F1-F12 keys rather than the specific Chrome OS function keys. In that scenario, you'll use Ctrl + F5 and Ctrl + Shift + F5, respectively.
For that third command, you'll use your mouse/trackpad/touchscreen to select which open Chrome window or Android app you want to capture. For those times when there's just a part of your screen you want to save, it's quite handy — but you can also use the Screen Capture toolbar to trigger a screen recording or a manual selection screenshot.
How to take a screenshot on Chromebook with the new Screen Capture toolbar
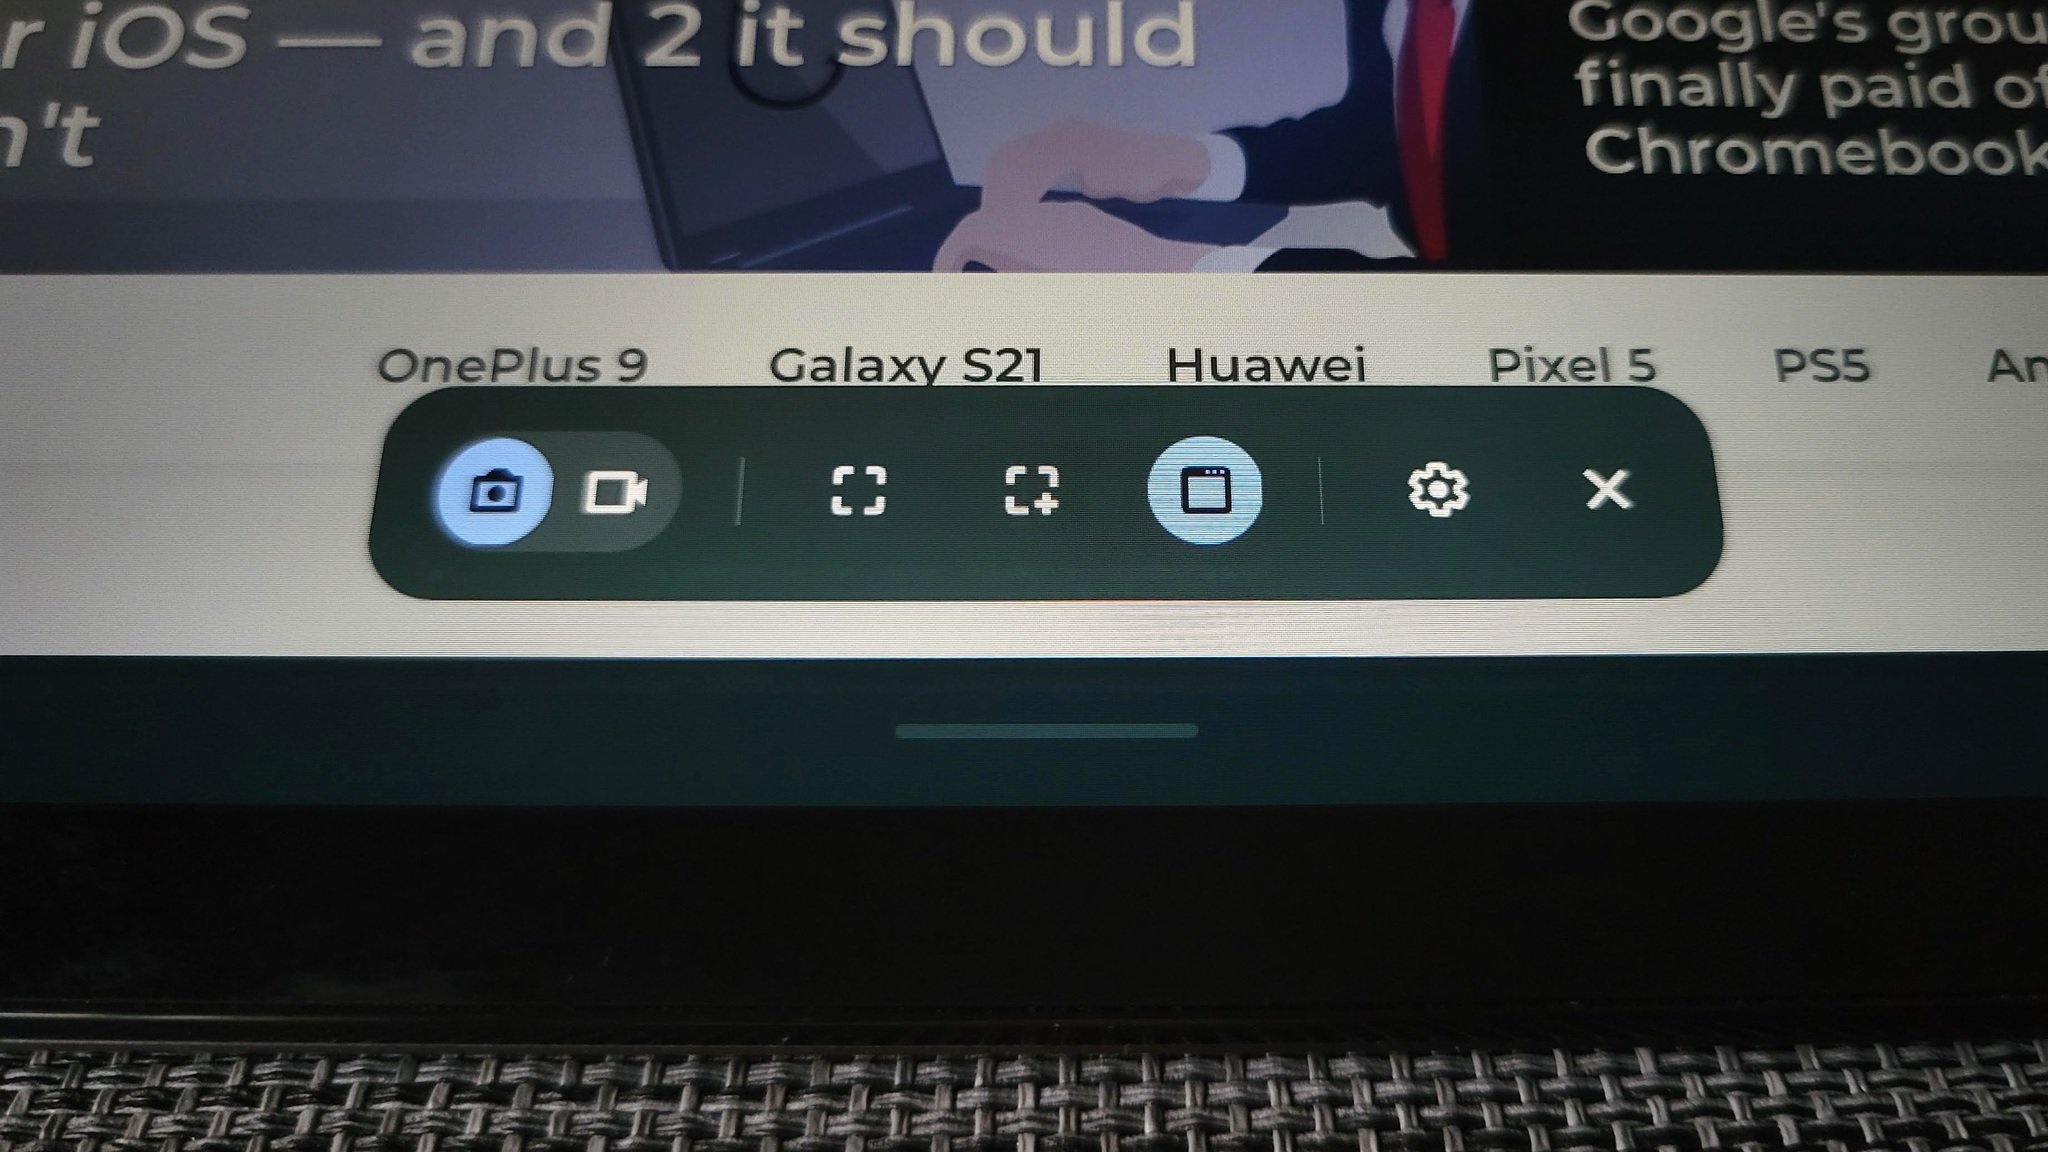
Now that you can take both static screenshots and screen recording videos, Google has smartly given us a dedicated toolbar for Screen Capture, and you can either access it by using the third keyboard shortcut listed above or from the quick settings menu:
Tap the time in the bottom-right corner of the screen.
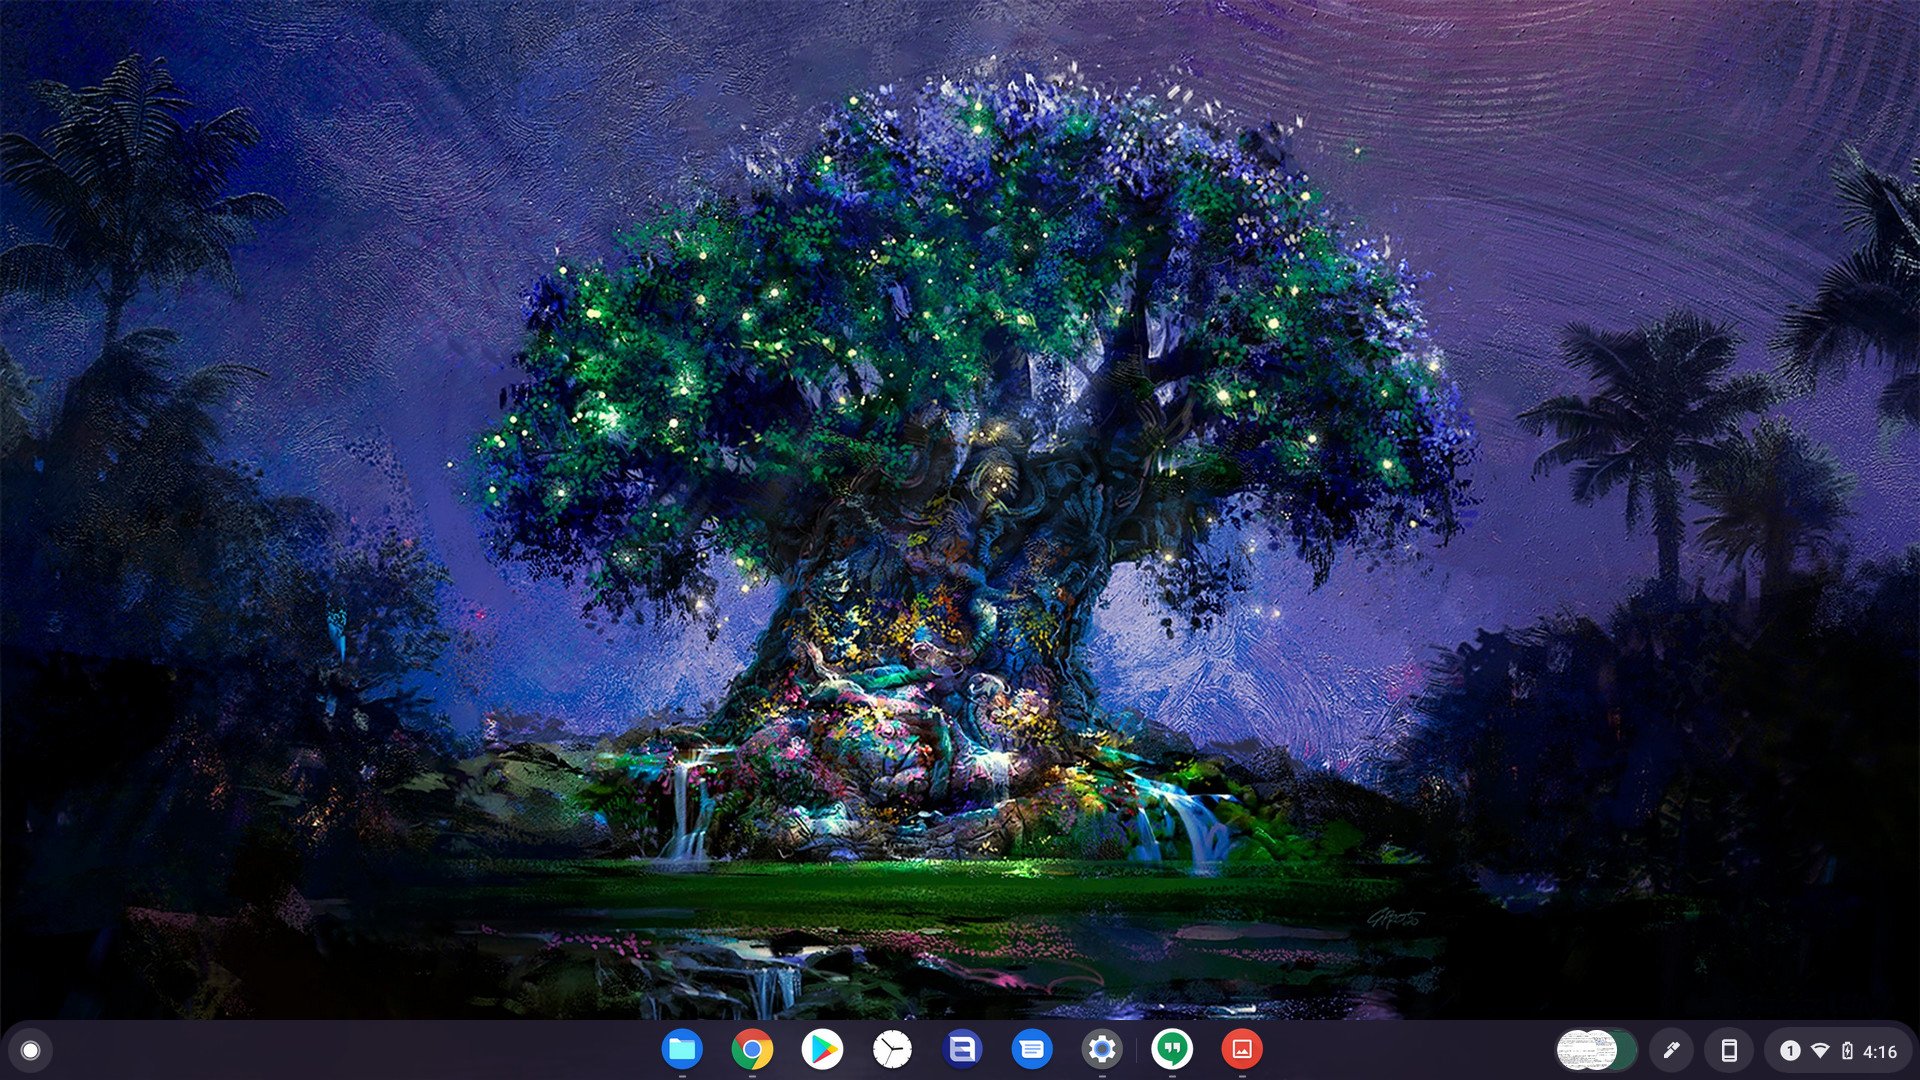
Tap Screen capture in the Quick Settings toggles.
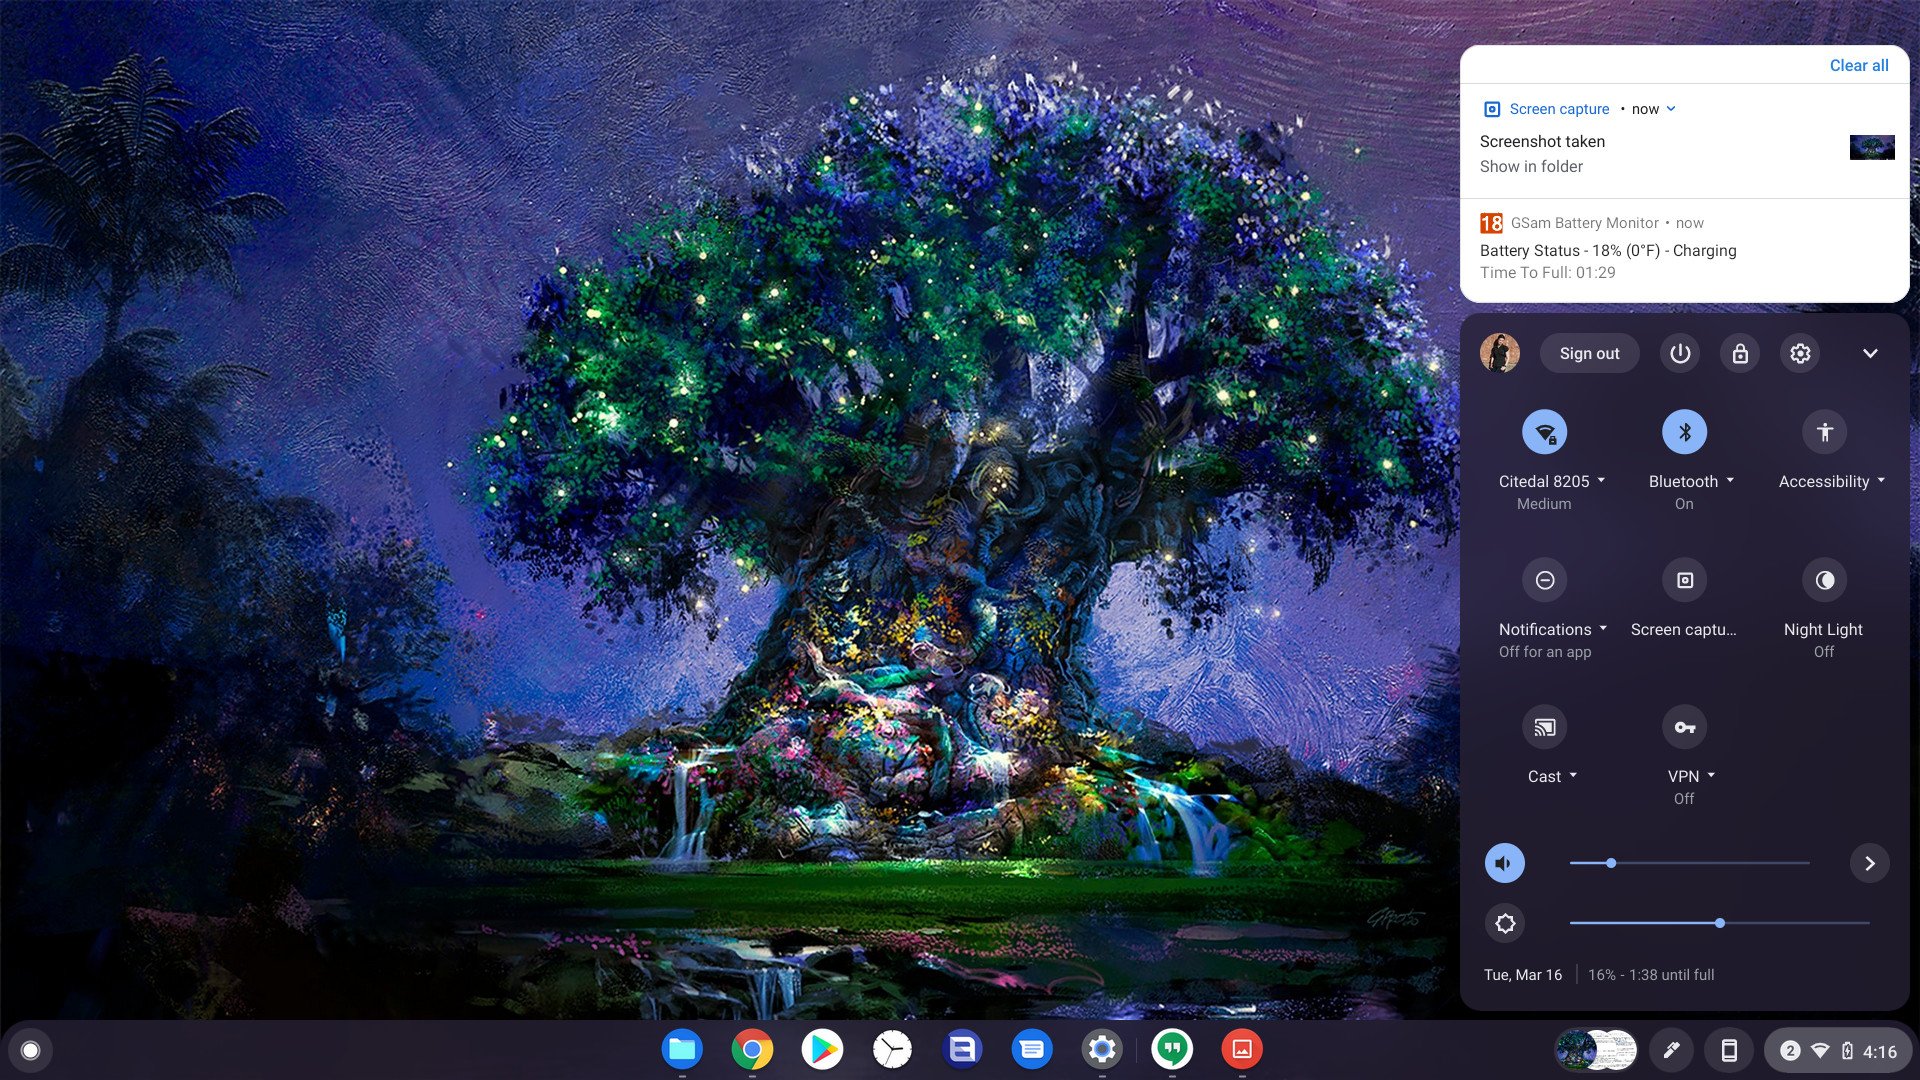
- If you want to take a screen recording rather than a screenshot, tap the camera toggle on the left-hand side of the Screen capture bar.
- If you want to record your microphone, tap the settings gear on the right side of the bar.
Tap record microphone to toggle it on.
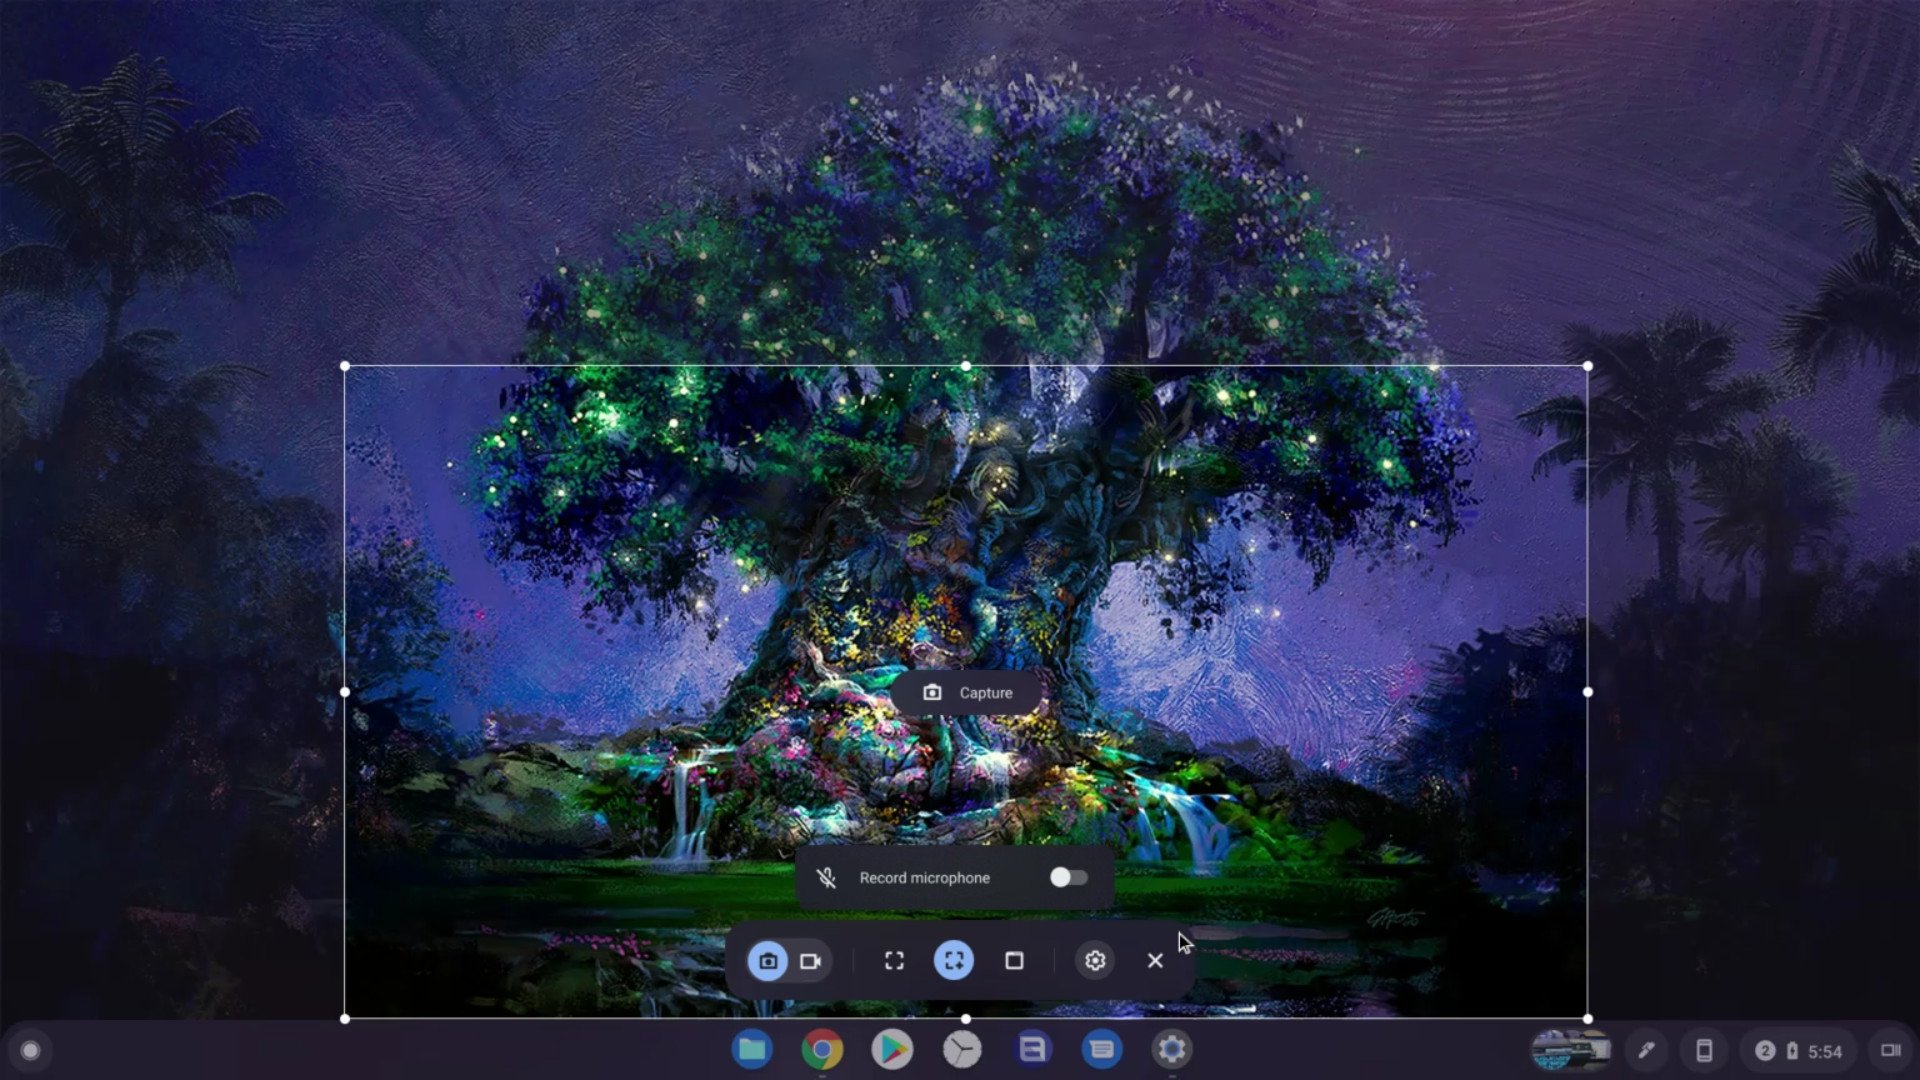
- To take a fullscreen capture, tap the plain rectangle next to the camera toggle.
Tap anywhere on the screen to capture it.
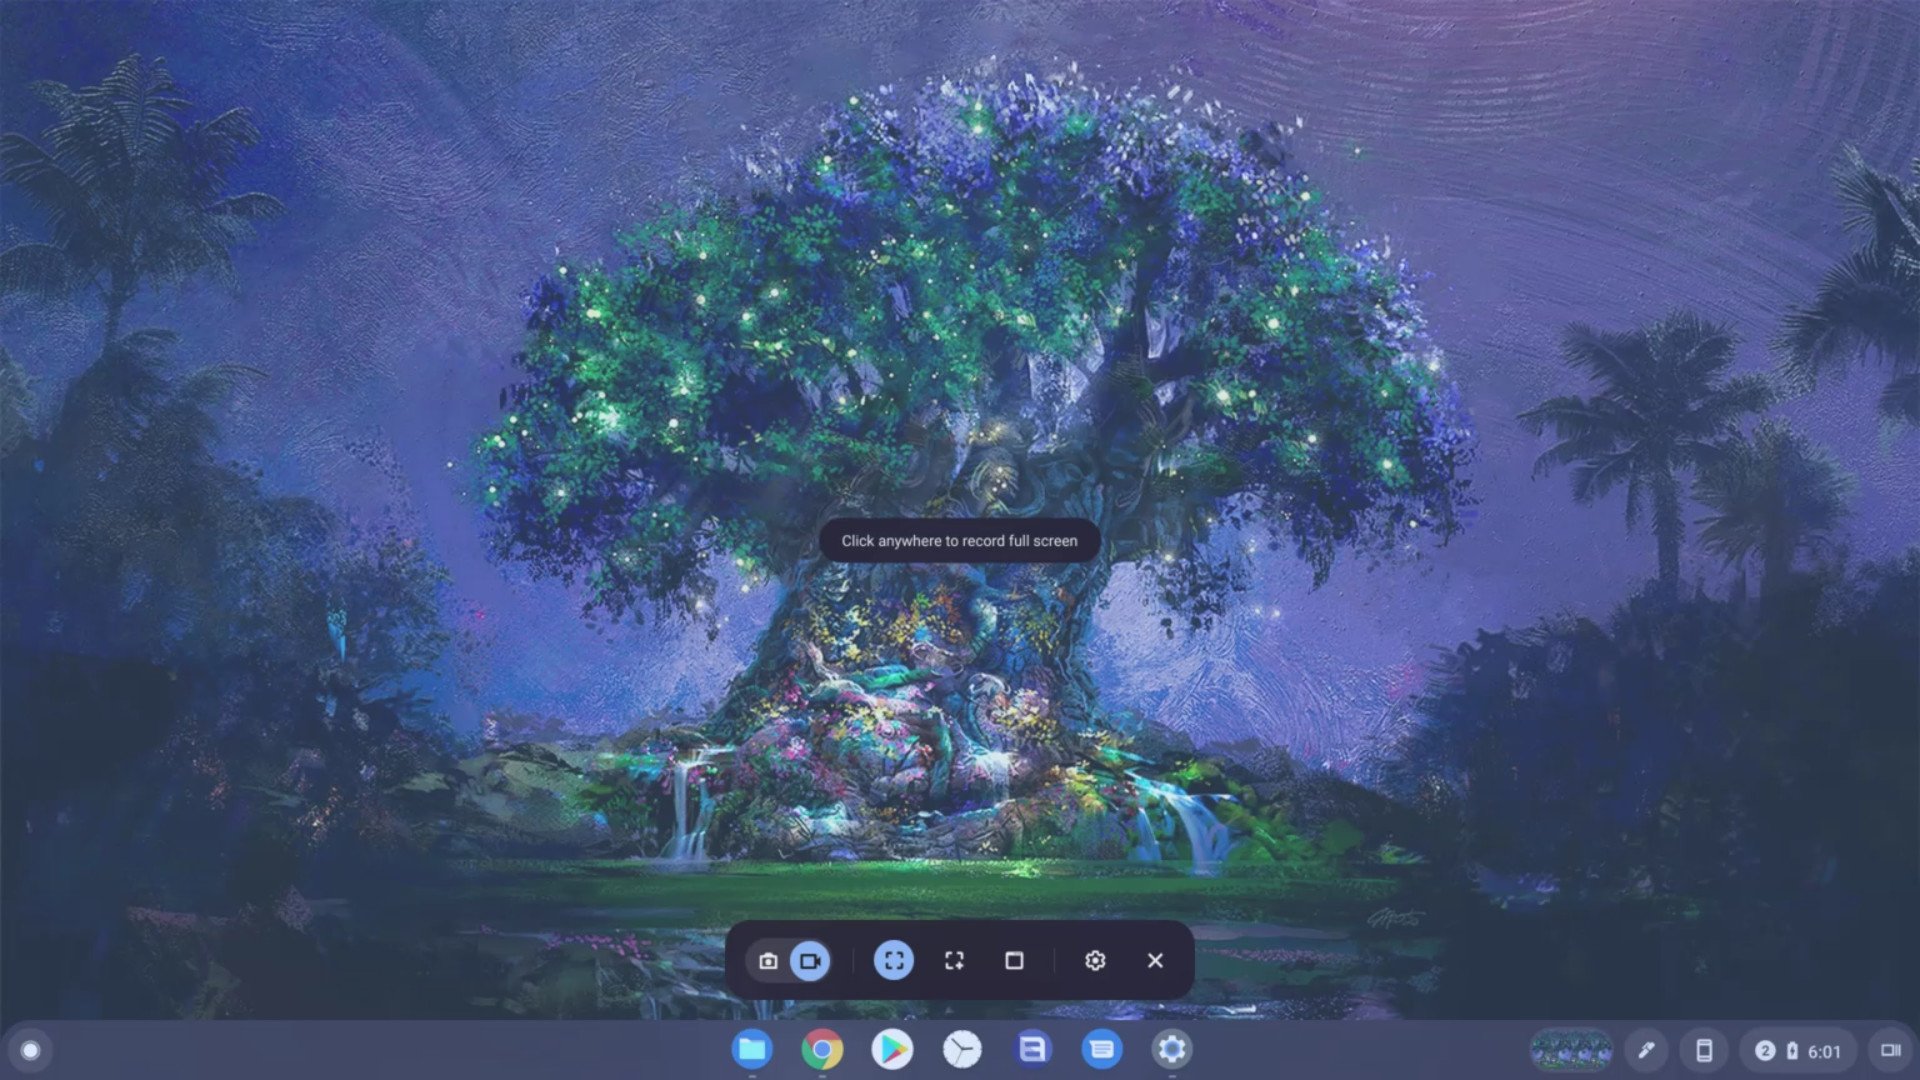
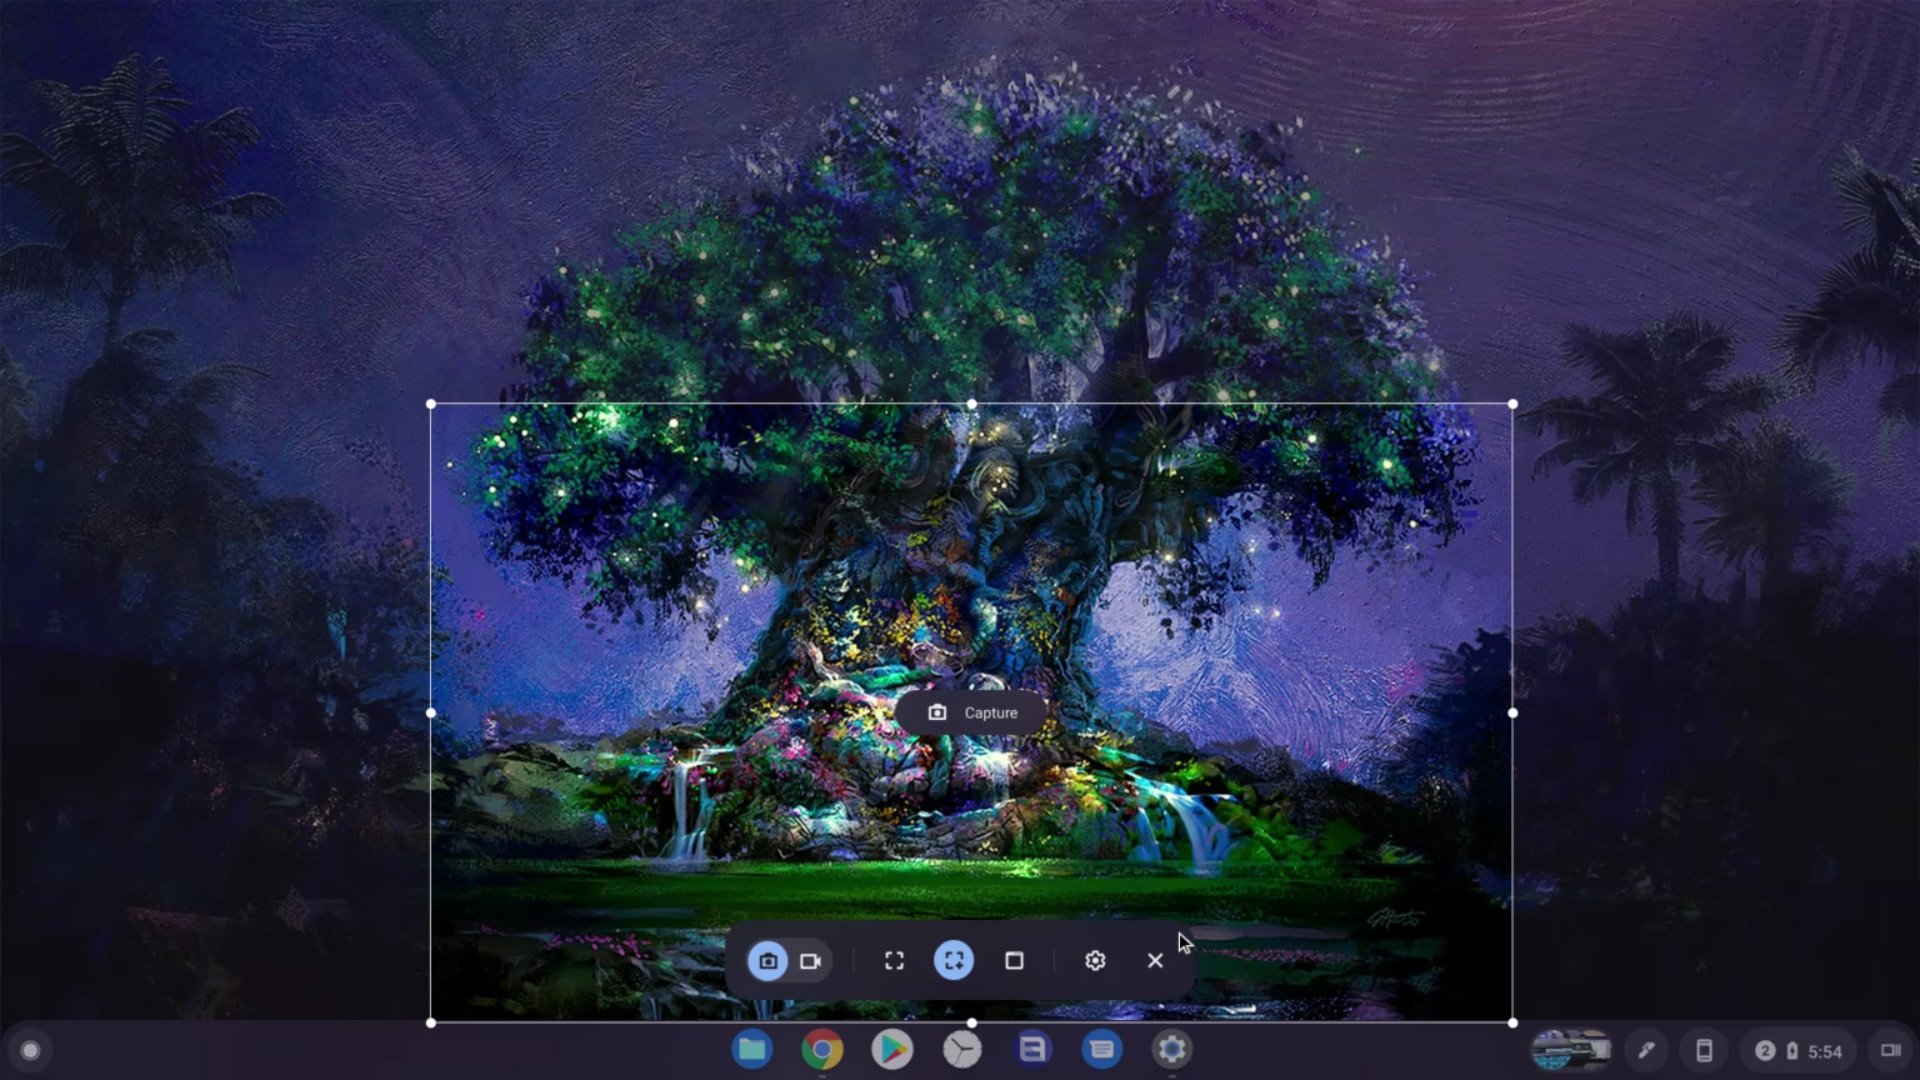
- To take a partial screen capture, tap the rectangle with the plus symbol dead center of the bar.
- Drag a rectangle around the portion of the screen you want to record.
Tap Capture.
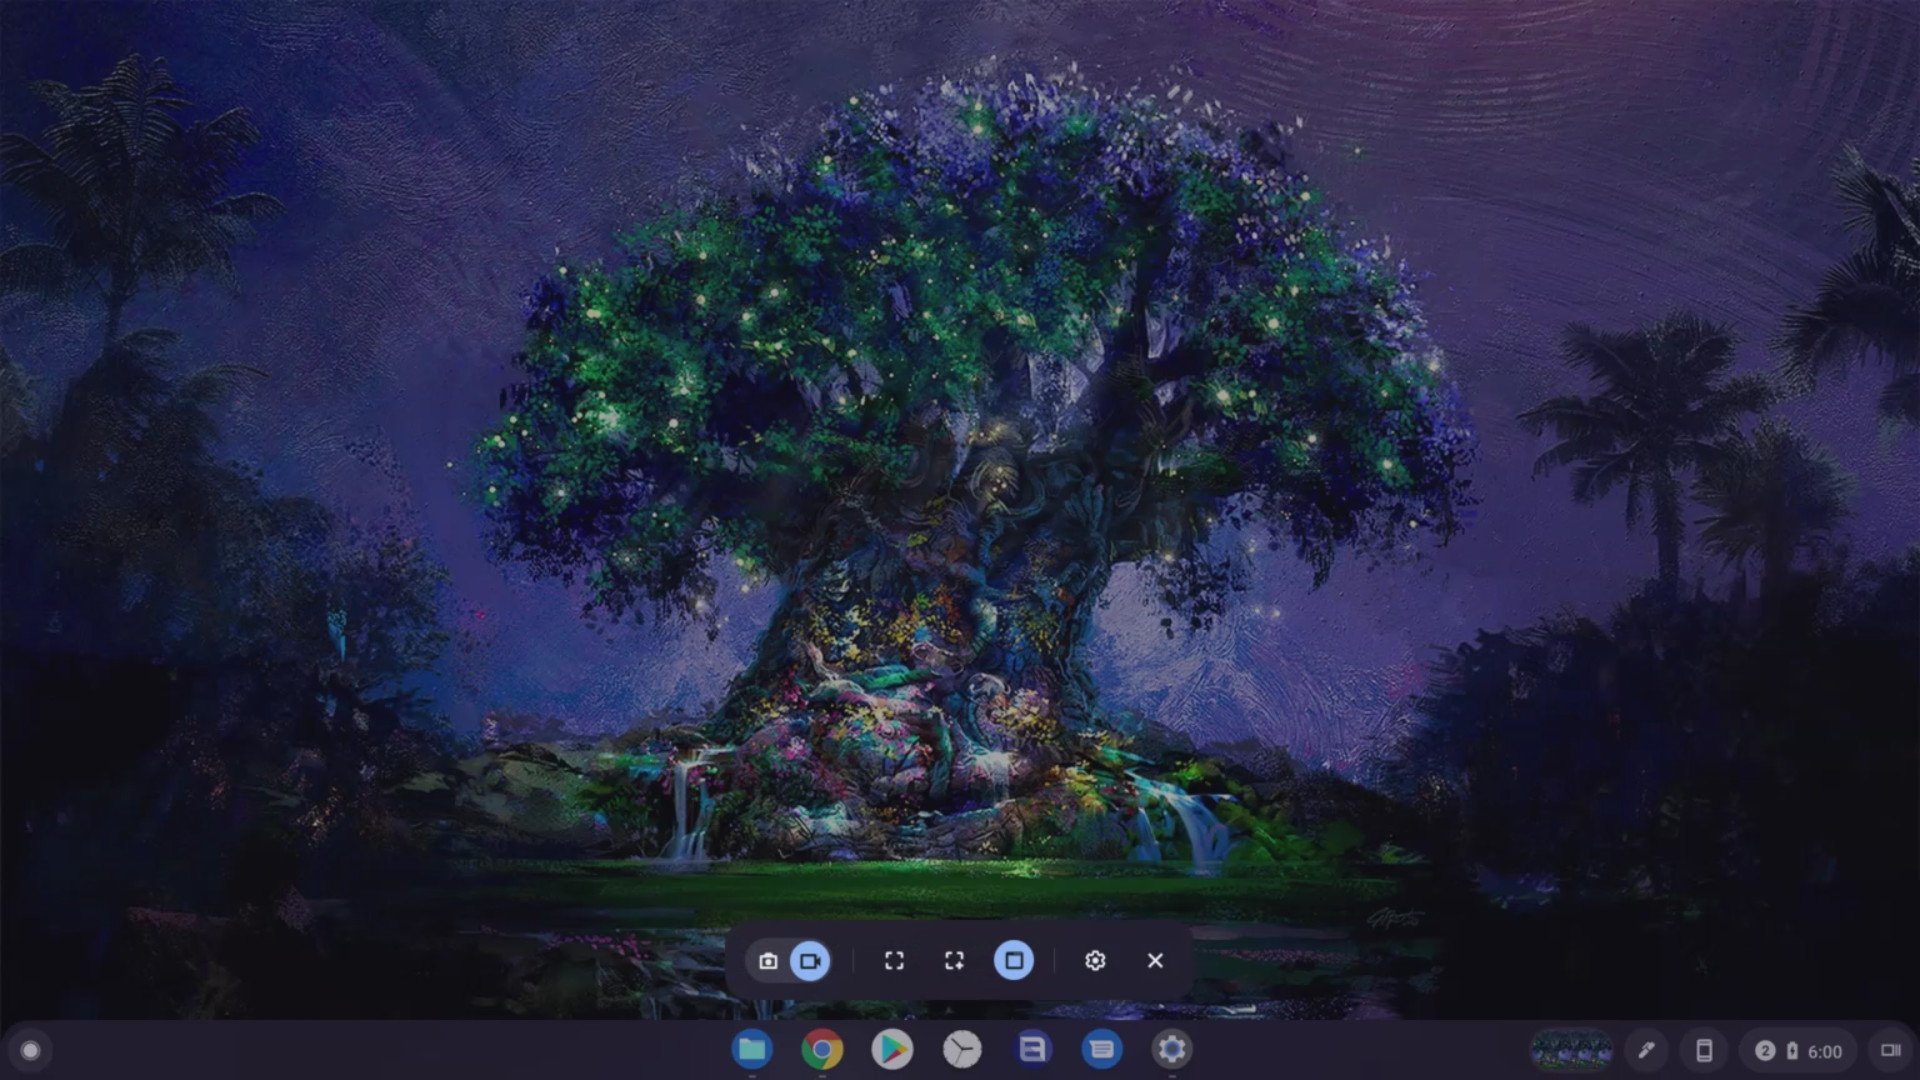
- To take a single window capture, tap the browser window icon next to the settings gear.
- Tap the window you want to capture.
To close the Screen capture toolbar without capturing anything, tap the X on the right side of the bar.
How to take a screenshot with a Chromebook stylus
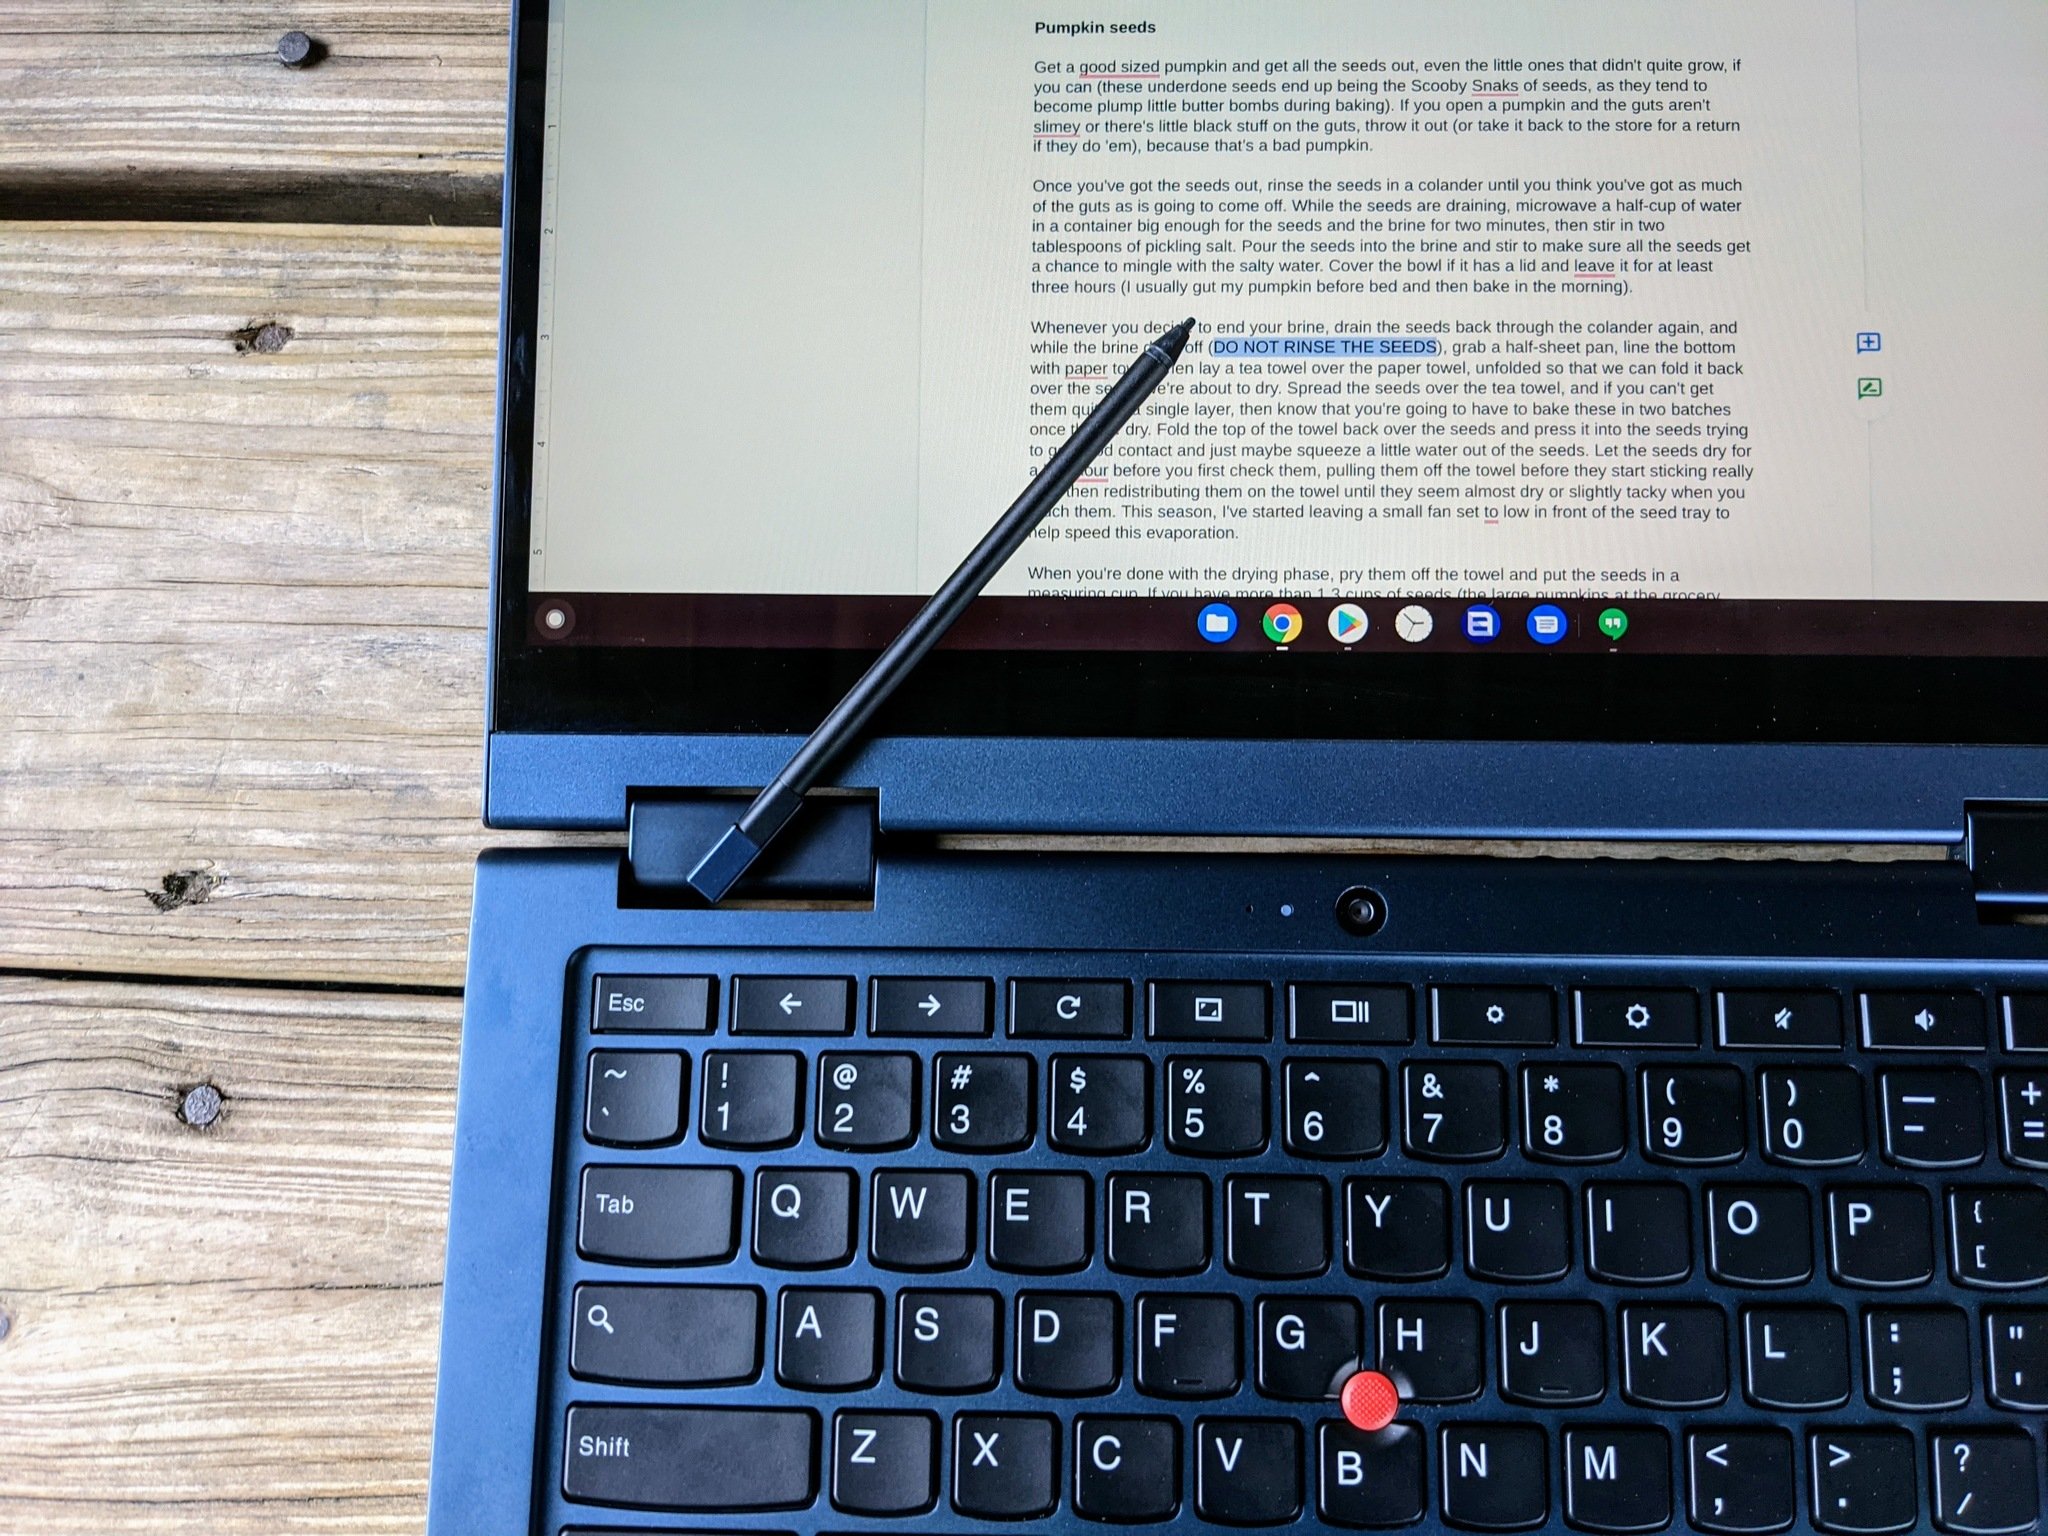
Once upon a time, only a couple Chromebooks had stylus support and thus stylus screenshot capabilities, but these days there are a great and growing number of Chromebooks with USI stylus support — from the $250 Lenovo Chromebook Duet to beefier Chromebooks like the Acer Chromebook Spin 713 — and all Chromebooks with stylus support have to option for taking a screenshot with your stylus.
- Tap the stylus icon in the dock.
Tap Screen capture.
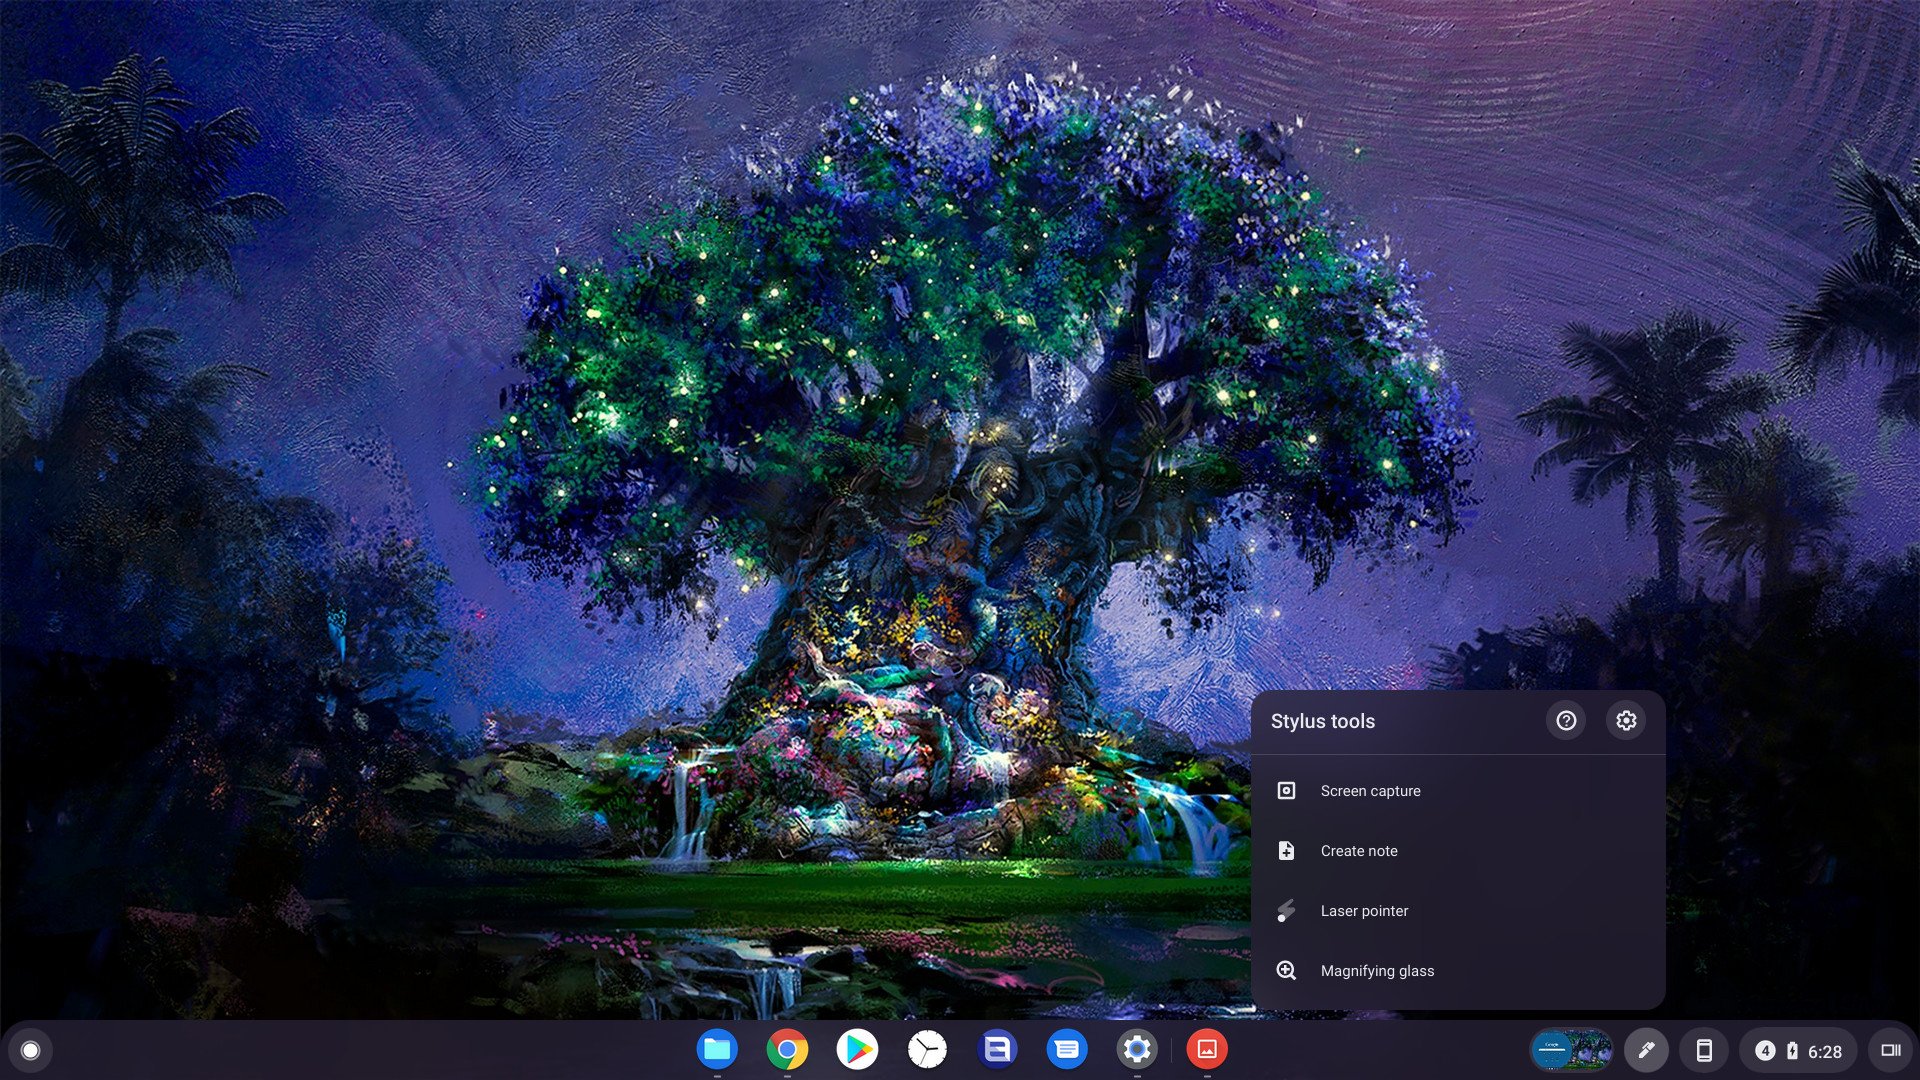
- Tap the rectangle with the plus symbol dead center of the bar.
- Drag a rectangle around the portion of the screen you want to record.
Tap Capture.

How to record your Chromebook's screen
If you want to take a video rather than a still screenshot, that's easy enough to do on a Chromebook now that Chrome OS 89 has rolled out to everyone. Before Chrome OS 89, we had to rely on third-party Chrome extensions for screen recording, but now we've got it built in.
Tap the time in the bottom-right corner of the screen.

Tap Screen capture in the Quick Settings toggles.

- If you want to take a screen recording rather than a screenshot, tap the camera toggle on the left-hand side of the Screen capture bar.
- If you want to record your microphone, tap the settings gear on the right side of the bar.
Tap record microphone to toggle it on.

- To take a fullscreen capture, tap the plain rectangle next to the camera toggle.
Tap anywhere on the screen to begin recording.

After a 3 second countdown, the recording will start. To end your recording, tap the red stop icon in the dock next to the Totes document hub.
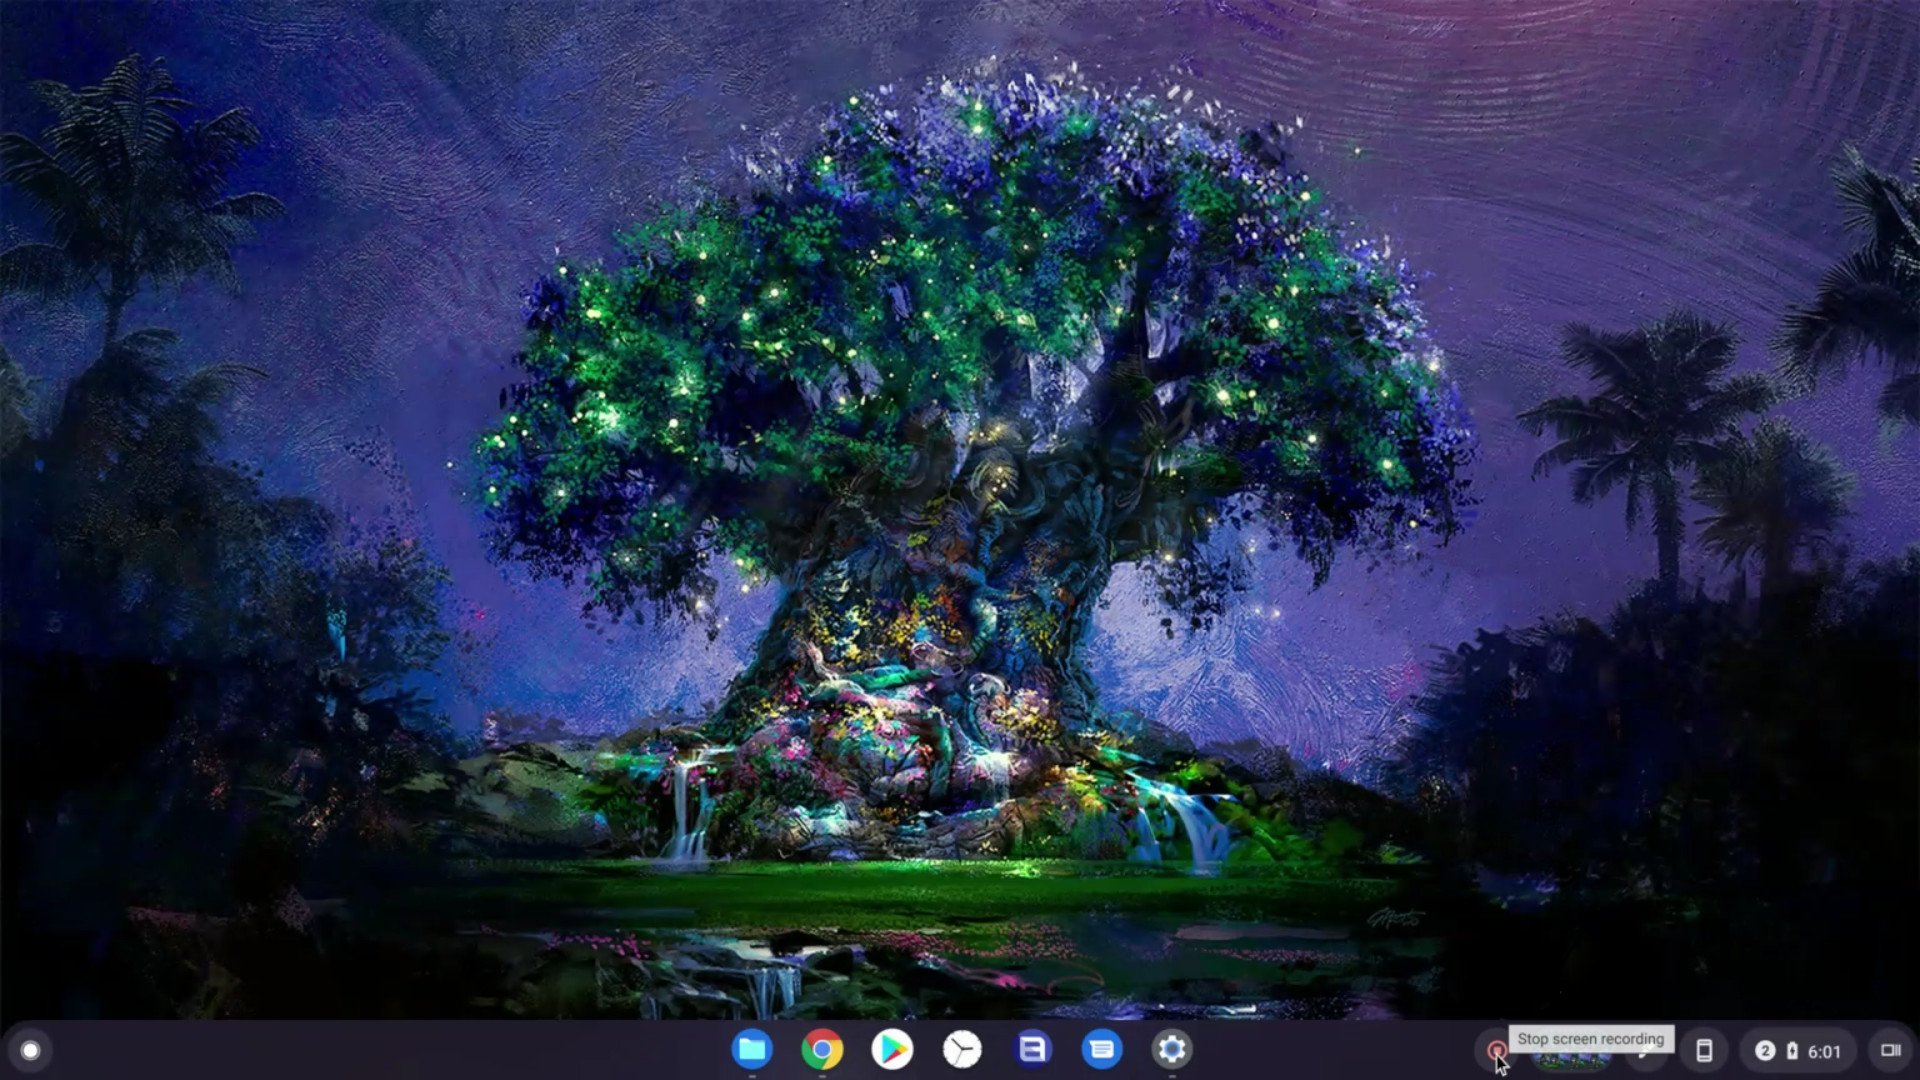
A notification will appear acknowledging the new recording in your Downloads folder, and giving you a quick toggle to delete the video if you recorded it by accident. Chrome OS's screen capture is a basic recorder, but for 90% of us, that'll be enough, but if you need something with more options and tools, consider Screencastify, which has both free and paid versions depending on how many of its features you need.
18/03/2021 01:00 PM
Grammarly's handy tone detector is now available on Android and iOS
18/03/2021 06:24 PM
Facebook Will Support 2FA Security Keys For Users On iOS And Android
18/03/2021 09:03 PM
Xiaomi Mi Smart Clock review - Repeating the same mistakes, time after time
18/03/2021 08:52 AM
The Morning After - Intel recruits a former enemy in the Mac vs. PC battle
18/03/2021 12:25 PM
OnePlus CEO shares key details on the upcoming OnePlus 9R
18/03/2021 12:01 PM
Outfit Your Home With The Ring Video Doorbell 3 For Only $149
18/03/2021 01:56 PM
Google Play Store to crowdsource “app install optimization”
18/03/2021 07:00 PM
WWE Officially Launches On Peacock, WWE Network US Dies On April 4
18/03/2021 04:15 PM
- Comics
- HEALTH
- Libraries & Demo
- Sports Games
- Racing
- Cards & Casino
- Media & Video
- Photography
- Transportation
- Arcade & Action
- Brain & Puzzle
- Social
- Communication
- Casual
- Personalization
- Tools
- Medical
- Weather
- Shopping
- Health & Fitness
- Productivity
- Books & Reference
- Finance
- Entertainment
- Business
- Sports
- Music & Audio
- News & Magazines
- Education
- Lifestyle
- Travel & Local


